Create Constraints
Goal
Constraints are rules that will be evaluated when trying to place the template in the end-user's room. If they cannot be
satisfied in the end-user's room, the template will not fit in that room and thus this template will not generate an
automated proposal.
Defining constraints is optional. Too many constraints will make the template too rigid to adapt to different rooms. No
constraints will make a very flexible template that can give unexpected shapes. One should only add necessary
constraints. 3DVIA recommends to define a set of constraints depending on each shape so that all of the templates are
consistent: see the best practices.
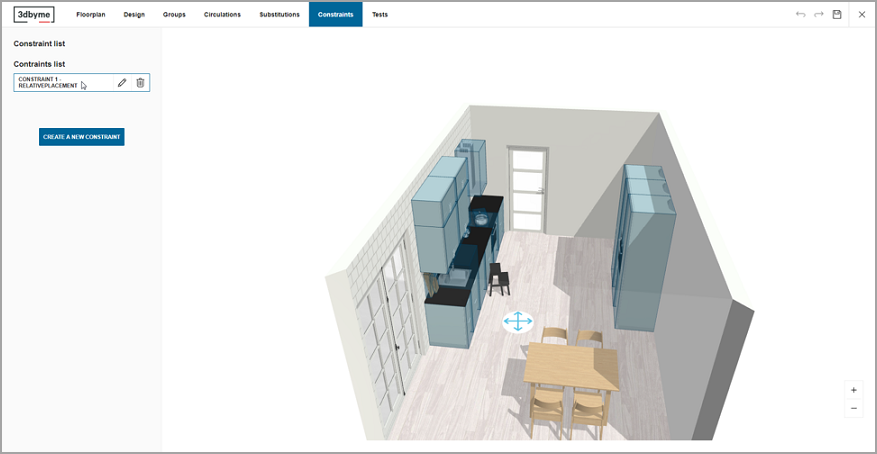
Relative Placement Constraint
This type of constraint enforces the relative placement of groups. There are several relative placement types.
Face to face
This constraints means that these two groups reference walls will always be face to face in the consumers room.
Facing the same direction (not necessarily on the same wall)
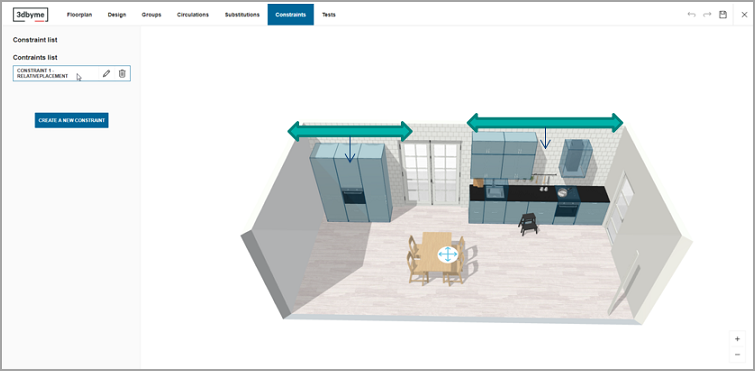
This constraints forces two groups to face the same direction. In this example, these two groups are not on the same
wall, so the same wall constraint will not work to have this set up.
Perpendicular to each other (reference walls will be perpendicular to each others)

This constraint means that these two groups reference walls will always be perpendicular to each other in the consumer's
room.
Perpendicular specifically with a specified side (group A on the left of group B)
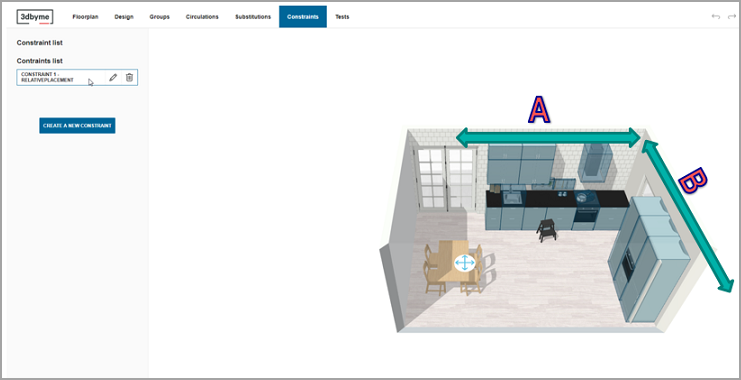
This constraint will always force the first group selected (A in this example) to be perpendicular of B.
On the same wall
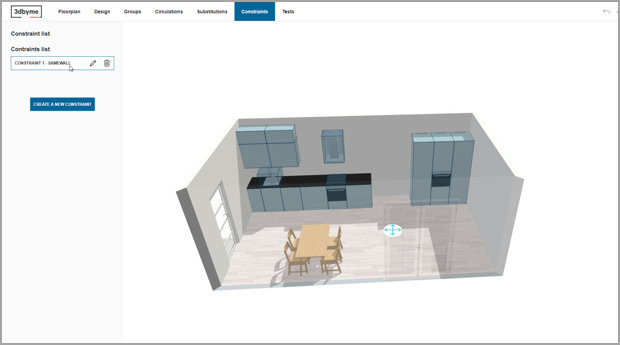
This constraint forces two groups to be on the same wall.
To define these relative placement constraints, the Range Manager needs to:
- Select two different groups.
- Select the type of constraint.
Distance Constraint
Distance constraints are used to keep a particular distance between two products in different groups.
When placing the template into another room, the template engine will try to get as close as possible to the goal
distance. Solutions placed between the minimal and maximal distance will be tolerated. Any solution outside of that
range will not be shown.
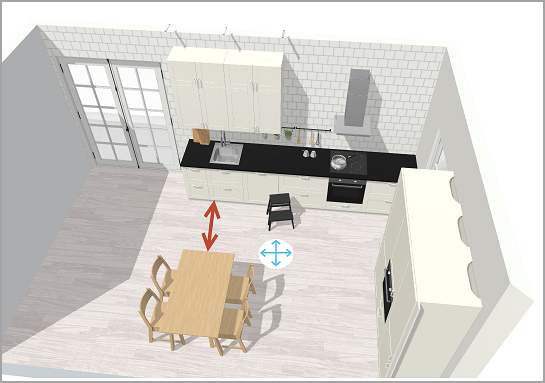
Example: There is a table and four chairs in the scene. The intention being to keep the table not far from the base
linear, the Range Manager will define a distance constraint with a goal of 700mm, a minimum of 450mm and a maximum of
1000m from the base linear.
Because of the current way we represent distance constraint in our code, both products needs to be oriented in the
layout the way they should be oriented in the solutions.
If the goal distance is not respected, at least the orientation and rough position from the original layout will be
conveyed to the solutions.
To define such a constraint:
- Select a product in two different groups.
- Select the direction of the distance constraint (one of the products axis).
- Indicate the goal, minimum and maximum distance.
Note: A constraint with any of those information missing is invalid. Direction is defined according to the products axis, click on the axis to select the intended direction. Once both products and a direction is chosen, the current distance between the two products is shown and used as the default goal. To do that is useful if the current position is the correct one, and useful to understand the current distance. Feel free to modify it as needed. Minimum should be inferior to goal, and maximum should be superior to goal. A minimum of 20mm between min and max should be ensured (best practice).
Alignment Constraint
Alignment constraint keeps two products from different groups aligned according to a given direction. When the template
engine attempts to place the template in an other room, it will choose solutions where the two products are perfectly
aligned. Any solution outside of the error margin will not be shown.
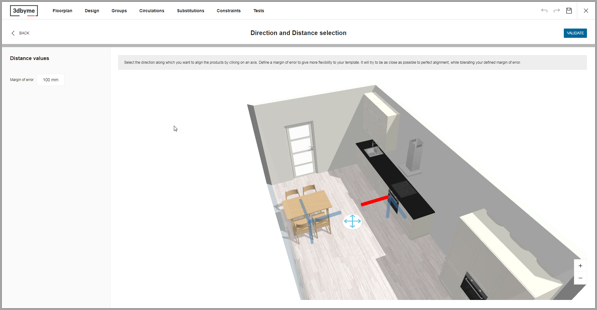
Example: There are two groups. The first one is the base linear. The second group is the table with the chairs. If the
constraint is to keep the table aligned with the oven then select the red axis and edit the margin of error. In this
example, 100mm means that the group will be between 100mm on the left side and 100mm of the right side of the selected
axis (red in this case).
To define such a constraint:
- Select a product in two different groups.
- Select the direction of the alignment constraint (one of the products axis).
- Indicate the allowed margin of error.
Note: A constraint with any of those information missing is invalid. Direction is defined according to the products axis. A minimum of 20mm of margin of error is advised (best practice).
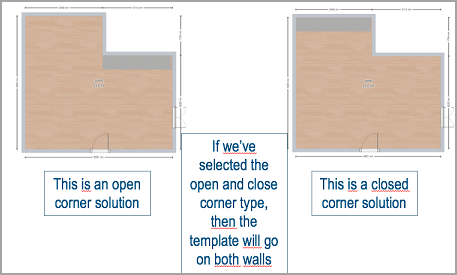
Corner Constraint
Corner constraints forces a group to be placed into a corner.
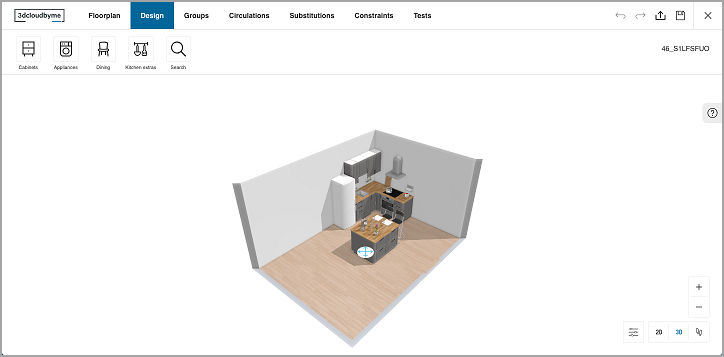
Example: The left side linear is the group that has the corner unit on it. This group should have a corner constraint
if one wants to have the corner cabinet into a corner.
To define such a constraint:
- Select a product in a group.
- Select the position according to the reference wall.
- Select between a close/open corner or a close corner only.
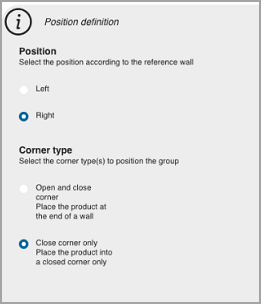
Note:
- A constraint with any of those information missing is invalid.
- Left and right are defined as left/right when facing the reference wall.
Distance to Wall
Distance to wall constraint should be used for straight linear like I-shape. It ensures that the linear will not be
touching the wall at its left or right end, but will instead sit at a minimum distance from the wall so that a filler
can be added automatically to the proposal and account for room imperfections.
The engine tries to respect this constraint but this it is not considered mandatory. If the algorithm can place it then
it will but otherwise will accept other solutions.
To implement such a constraint:
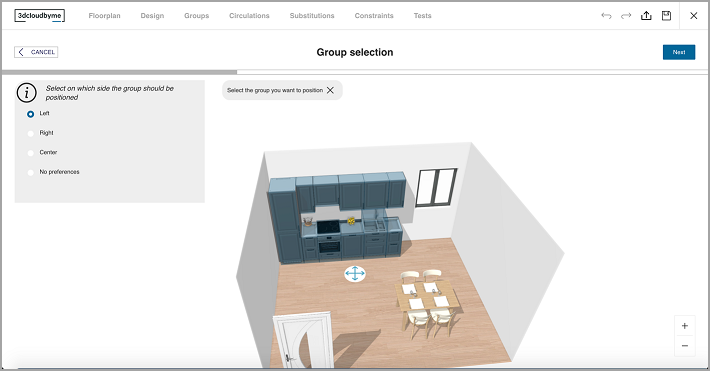
Select on which side the group should be positioned.

Define the minimum distance to the wall from the left side of the linear and then do the same for the right side.
Corner Filler
This constraint is applicable only if there is a corner filler in the catalog. It allows templates to fit in non-right
angles.
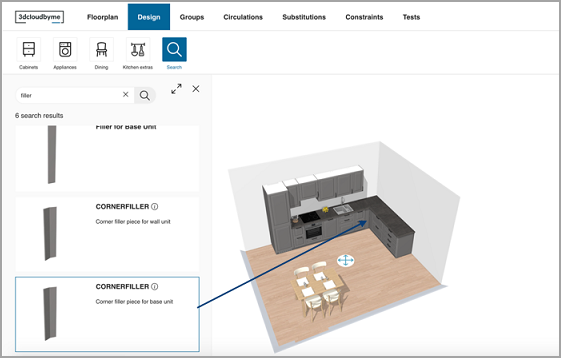
The corner filler product should be part of the layout, but not belong to either of the groups.
To create the constraint:
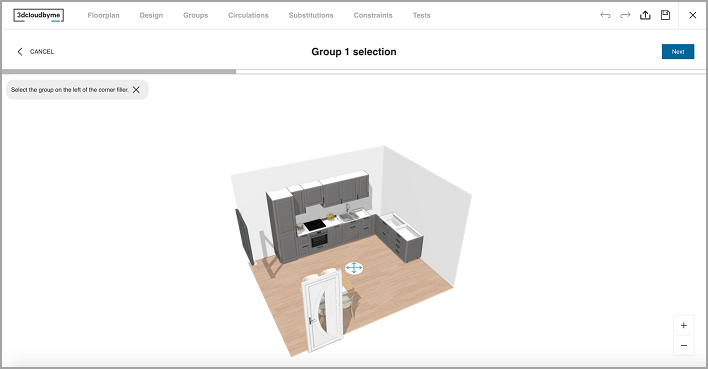
- Select the group on the left of the corner filler.
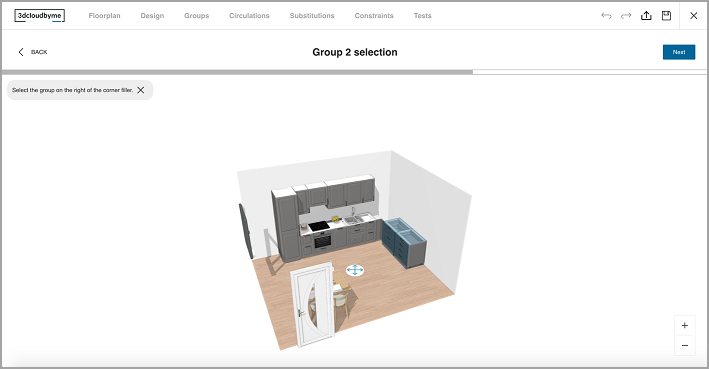
- Select the group on the right of the corner filler.
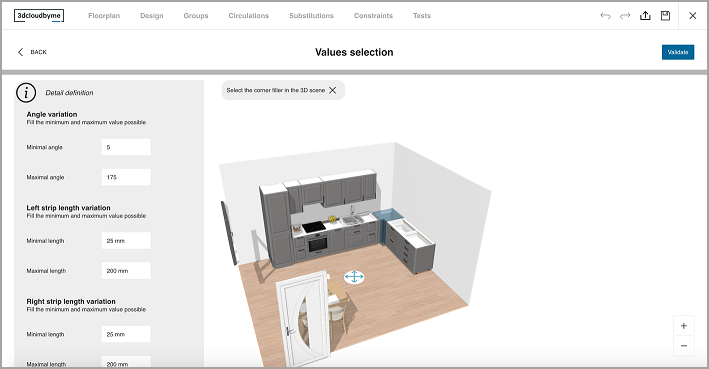
- Select the corner filler and the left panel will be filled automatically. Edit the values to change the behavior of the variable angle filler.
Replacement Rules
Replacement rules define a list of products from the catalog that can replace the original one.
Note: Replacement rules are valid if at least one replacement product is defined. Replacement can be on one specific product with as much replacement as needed, or on a several products that belong to a sub-group (Sub-groups are a groups of product that will be replaced together). Replacement products should have at least one dimension different from the original product.
Defining a replacement with the exact same dimensions is not forbidden in itself but it is useless as our algorithm is only based on size and will never use the alternative product. Replacement rules are not sequence able. The user cannot define in what order each product should be replaced-if 200mm more are available, the engine will either choose a wider sink or a wider drawer cabinet, but the Range Manager cannot specify which.
Example: The group contains a base kitchen unit with a sink that measures 600mm in width. One can replace it with another under sink unit of 800mm, or under sink unit of 1000mm with a wider sink.
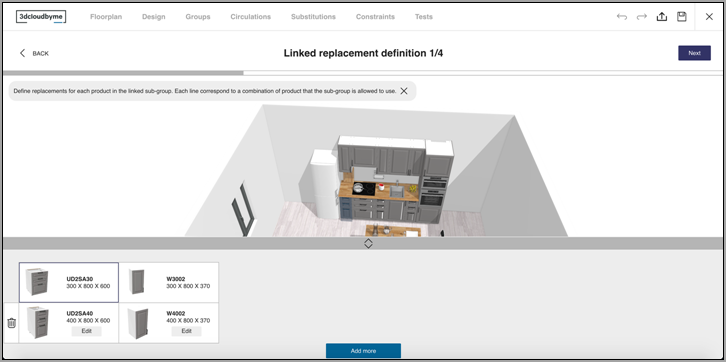
Linked Substitutions
Two products' substitution rules can be linked together. This ensures they will resize together to preserve the general aspect within a group. It's usually used to keep design consistency. Therefore, the user would want to link a base unit with its wall unit so that they stay aligned and scale together.
- Link in a sub-group
When products are linked into sub-group, it means that they grow together. In the example below, we have the left side base and wall units (next to the fridge) that have a default size of 300mm in width, but both can grow to 400mm.
If there is only enough space for the base cabinet to grow, then it will keep its default size since it's linked with the wall unit due to the sub-group concept.
Internal Constraints in the Group
-
Goal
Once all the substitutions rules are defined, internal constraints can be added to the group. Resizing a group means shifting products around as they change size. Internal rules will help keeping the general aspect of the group, shifting only what needs to be and preserving alignments.
There are two kinds of internal rules:-
Internal distance constraints bind two products together in one direction (A and B are 100mm apart and will stay 100mm apart).
-
Internal alignment constraints (A is centered on B and will stay that way).
No collision rules are followed while resizing a group, those constraints are the only thing defining how products should be moved around.
We identified two ways to define them:- Pre-compute a set of distance constraints knowing that the algorithm can create more of them than wanted, and let the user identify the rules they want to delete.
- Let the user define all the constraints by hand.
Alignments are still user defined.
In order to help define those internal constraints, we created a minimum/maximum feature that allows the user to see the group in its smallest and biggest size with the current constraints. This way one can iterate and identify mistakes until the desired result is achieved.
This part is essential but complex. An inexperienced user will probably make lots of mistakes. On the other hand, an experienced user will identify useless/unwanted constraints quicker than defining every single internal constraint themselves.
-
-
Internal distance constraints
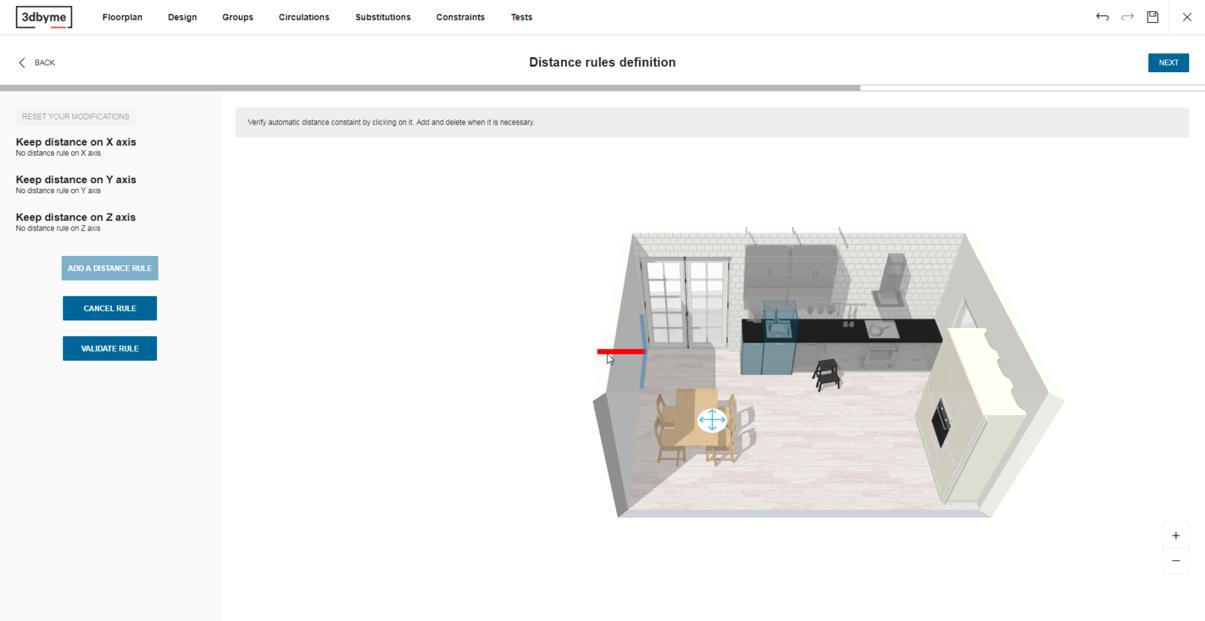
Internal distance constraints indicate which products to move around when products are resized. Such a constraint binds two products in one direction and lock the distance between them. The user should select the axis where she wants to define internal constraints in:
- X direction to move along the wall when their neighbor is resized.
- Y direction to bring them closer or further away from the wall.
- Z direction to move them up and down.
- Chaining distance constraints will make every products move as soon as one of them is resized.
Example: In the figure above, every cabinet is bound to the cabinet next to it. This way, when they are resized, they will move to stay stuck to each other.
Note:
- Unwanted constraints can prevent the group from resizing. For example, if the first cabinet on the left is linked to the hood, the distance between them will be preserved. Which means the in-between products, and thus the group, cannot resize because the algorithm will maintain the distance between these two products.
-
Internal alignment constraints
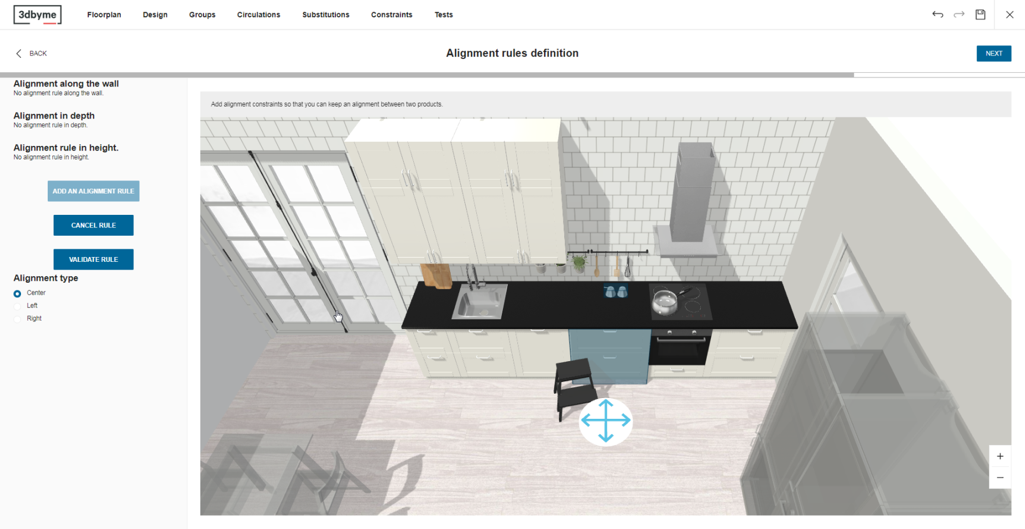
Internal alignment constraints indicate which products need to stay aligned when products are resized.
Alignment will be preserved as it is in the original layout. Three different alignments can be defined:-
On the center (adjusts the position of the center of product A to the center of product B).
-
On the left (adjusts the position of product A to the left side of product B).
-
On the right (adjusts the position of product A to the right side of product B).
Note:
- The alignment is following the wall of reference, which means that an alignment on the left would be the left of the wall of reference.
- Alignment preserves the original configuration.
- Alignments can be defined in three dimensions.
Example: In the figure above, the cabinet and the salt/pepper are aligned in the center. So that when the cabinet will be replaced by a different version (bigger or smaller) the salt/pepper will be on the center of the base unit.
Example: An oven and a hood on top of it. One wants the hood and the hood to stay aligned according to their center.
-