Set Up Cover Panels
Foreword
There are four different kinds of cover panels: side, back, top and bottom. Their purpose is only esthetical: hiding the cabinet frame.
- Base cabinets typically have back and side cover panels;
- High cabinets typically have back, top, and side cover panels;
- Wall cabinets typically have top, bottom and side cover panels
It is possible to configure the planner to manage automatically the side and back cover panels: they are deleted when not visible (i.e. fully covered by a wall or another cabinet) and added back when visible. See the required parameters🔗 to configure this feature. Top and bottom cover panels cannot be managed automatically and have to be set/unset manually by the user.
Another paricularity for cover panels is their pricing. Top and bottom cover panels are priced with an optimization algorithm that tries to use as few boards as possible to cover the user groups of cabinets. This means cover panels are shared accross several different units when they are aligned. Optionally you can choose to apply the same pricing optimization for back cover panels through the Cover Panel applicative rule 🔗. Side cover panels do not support this pricing optimization.
➡️️ Click here 🔗 to open the complete sample to define cover panels through API.
Illustrations
Below are illustrations of concepts regarding cover panels that are documented hereinafter.
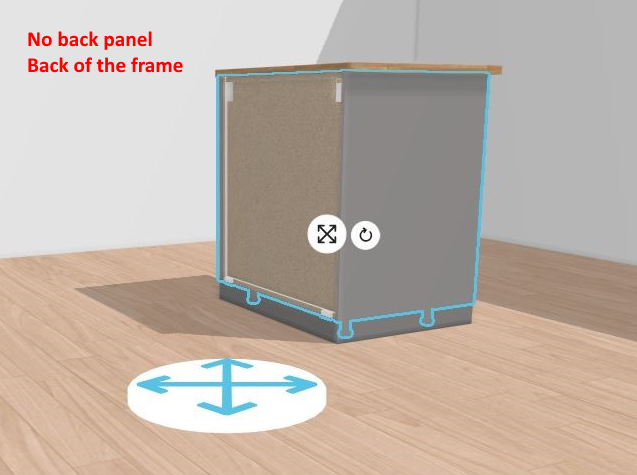
Base cabinet without back panel
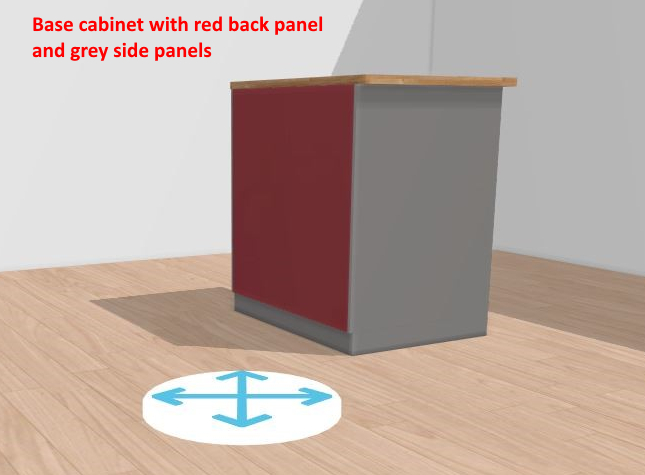
Different colors of cover panels
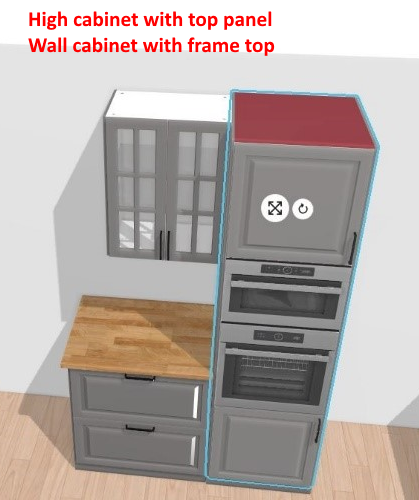
Wall and high cabinets
Specify the Basic Information
The minimum information required to create a cover panel is common to every kind of products.
This is:
- The name: The name will be displayed in the planner (in the Edit panel) and should be available for all languages. If not, the planner will display the name in the fallback language.
- Mandatory information: The product reference, the brand and the product type (i.e. "cover panel").
- Product information: This information is not mandatory but highly recommended, especially the short and long descriptions that are displayed in the planner.
- Product representation: This is where you specify among others the 3D resource, the thumbnail and the parameters.
- Pricing: ❗️ no pricing is expected for cover panel products because they must be generic products. The pricing is provided on the cover panel articles (representing boards of different dimensions).
❗️ Select your product type carefully because it will trigger the applicative rules: the type is "Cover panels".
Cover panel products must be generic products 🔗, see pricing below. The price must then be set on cover panel articles, not on the generic product.
Specify the 3D Resource and the Thumbnail
For cover panel the required resource is a scalable .BM3 that will define the shape of the panel.
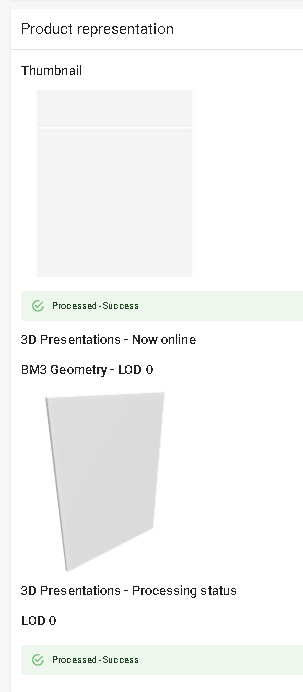
- Click on Replace to browse for your .BM3 file and add it to the datasheet.
- Next to thumbnail click
 to specify the bitmap file that will be used as thumbnail in 3DCloud and in the planner.
Follow the format and size recommendations.
to specify the bitmap file that will be used as thumbnail in 3DCloud and in the planner.
Follow the format and size recommendations.
Specify the Dimension Parameters
| Parameter | Type | Possible values |
|---|---|---|
width | real | [0 ;∞] |
depth | real | [0 ;∞] |
height | real | [0 ;∞] |
Click Create parameter in the Parameter panel to define the default width, depth and height of the cover panel.
For optimized cover panels
❗️ When cover panels are optimized (see the foreword), they have a very specific way to interpret their dimension parameters in the planner. You have to strictly follow this semantics to ensure a correct pricing with the optimization algorithm.
Keep in mind that side cover panels do not support the pricing optimization so this section does not apply to them.
depthmust always be the thickness of the boardwidthmust be the fixed length of the board. This corresponds to the board dimension that does not change when adding cabinets side by side- for a top or bottom cover-panel, this corresponds to the depth of the cabinet.
- for a back cover-panel, this corresponds to the height of the cabinet.
heightmust be the variable length of the board. This corresponds to the board dimension that does change when adding cabinets side by side- for a top or bottom cover-panel, this corresponds to the width of the cabinet.
- for a back cover-panel, this corresponds to the width of the cabinet.
Example for an optimized top/bottom cover panel
| Parameter | Default value | Possible values | Note |
|---|---|---|---|
width | 600 | [375;600] | board fixed length. In this example, this cover panel comes in two different sizes (375mm and 600mm). These values correspond to the depth of wall-cabinets in the catalog. If your range also has 650mm deep wall-cabinets and a user adds that to their project, the algorithm fails to find fitting boards and the price stays at 0. |
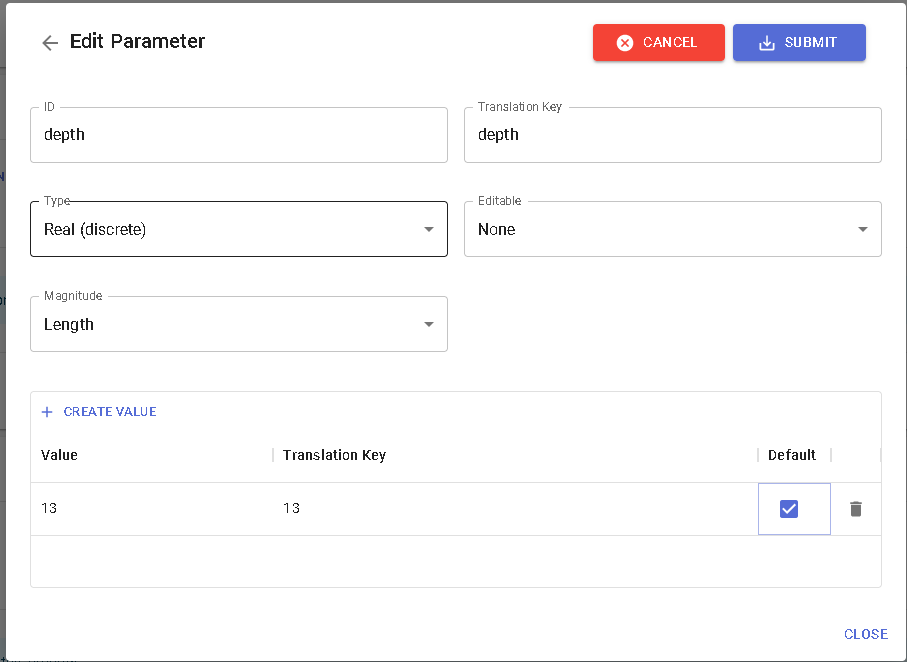
depth | 13 | [13] | board thickness, only 1 possible value. |
height | 1500 | [1200;1500;1800;3000] | board variable length. In this example, this cover panel comes in four different sizes. These values correspond to what you sell in terms of board lengths. If a user inserts a cabinet group that exceeds 3000mm, several boards are be priced to cover the surface, with a smart optimization algorithm. |
Example for an optimized back cover panel
| Parameter | Default value | Possible values | Note |
|---|---|---|---|
width | 850 | [800;850;1200] | board fixed length. In this example, this cover panel comes in three different sizes. These values correspond to the height of cabinets in the catalog. If your range also has 1300mm high cabinets and a user adds that to their project, the algorithm fails to find fitting boards and the price stays at 0. |
depth | 13 | [13] | board thickness, only 1 possible value. |
height | 1500 | [1200;1500;1800;3000] | board variable length. In this example, this cover panel comes in four different sizes. These values correspond to what you sell in terms of board lengths. If a user inserts a cabinet group that exceeds 3000mm, several boards are be priced to cover the surface, with a smart optimization algorithm. |
Pricing
As described above, cover panels must be generic scalable products and cover panel articles (containing prices) must be mapped by dimensions on the generic cover panel product. For each cover panel article, go to the Pricing panel to define the price(s).

Like every product, cover panel articles support different pricing types: regular, reduced, membership, etc.
Optimized pricing
When a cover panel is optimized (see the foreword), it is priced by an optimization algorithm that seeks the best list of boards to cover the surface exposed by groups of adjacent cabinets.
As multiple cabinets share the same boards, these optimized cover panels are not located inside the "products" section of the Bill of Material (BOM) 🔗, but under the "linears" section.
Non-optimized pricing
When a cover panel is not optimized, it is priced per unit regardless of its neighbor cabinets. Still, the planner uses a particular algorithm to price these elements: it seeks the single best board to fit the exposed face. For more information, check the BOM documentation 🔗.
Product Mapping
The mapping is used when pricing the cover panels (for both the optimization algorithm and the non-optimized best board algorithm). The cover panel generic product must contain a mapping to all of its boards, mapped on the three dimension parameters: width, depth and height.
❗️ These three dimensions have a reserved meaning when it comes to optimized cover panel boards. See above for the description.

Note: cover panel mappings ARE NOT regular product mapping as documented here 🔗. They use the product mapping structure to configure the behavior, but it is a dedicated algorithm that solves this mapping. For that reason, only simple and flat mappings are supported with only the "EQUALS" comparison and "&&" operator.
Parameters to add at top level
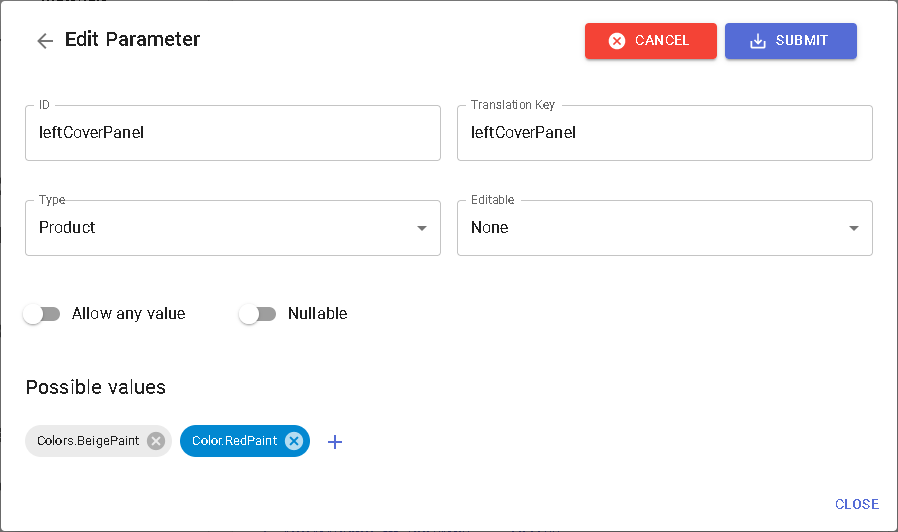
A common practise is to let the user choose the cover panel they want in the planner. You then must list the compatible
cover panel products at the top-assembly level using a visible product parameter:
e.g. leftCoverPanel, backCoverPanel.
To enable the automatic cover-panel behaviors in the planner, you also have to setup a few additional invisible boolean parameters:
leftCoverOptionrightCoverOptionbackCoverOptionbackLeftCoverOption(for corner cabinets)backRightCoverOption(for corner cabinets)
📌 As detailed above, this automatic feature is not available for top and bottom cover panels, that is why it is not useful to add
topCoverOptionandbottomCoverOption.
To let the end user decide whether or not to let the planner manage cover panels automatically, you can also setup the following boolean parameters:
autoLeftCoverPanelautoRightCoverPanel
📌 These parameters should be visible and editable for the end user. They are only available for left and right cover panels and let the user enable the automatic cover panels (auto management by the planner) or disable it (manual management by the user).
Cabinet Top Level Update
To definitely activate the cover panel option on a cabinet, the following parameters should be defined at top-assembly level.
📌 Parameters followed by an * are mandatory for automatic behavior.
Every Type of Cabinet
The following parameters are intended for base, corner, high and wall cabinets.
❗️
leftCoverPanelmust be 'nullable' andleftCoverOptionis FALSE by default.
| Parameter name | Type | Possible values | Function |
|---|---|---|---|
rightCoverOption* | boolean | TRUE / FALSE | Enable the automatic behavior to deactivate the right cover panel of a cabinet if it is fully covered. ( Requires rightCoverPanel [product]) |
leftCoverOption* | boolean | TRUE / FALSE | Enable the automatic behavior to deactivate the left cover panel of a cabinet if it is fully covered. ( Requires leftCoverPanel [product]) |
rightCoverPanel* | product | – | Dedicated parameter for client Range integration. |
leftCoverPanel* | product | – | Dedicated parameter for client Range integration. |
autoRightCoverPanel | boolean | TRUE / FALSE | Parameter to let the user decide to manage the right cover panel automatically or not (Requires rightCoverPanel [product] and rightCoverOption [boolean]) |
autoLeftCoverPanel | boolean | TRUE / FALSE | Parameter to let the user decide to manage the left cover panel automatically or not (Requires leftCoverPanel [product] and leftCoverOption [boolean]) |
Base and High Cabinets Only
The following parameter is for specific types of cabinets.
| Parameter name | Type | Possible values | Function |
|---|---|---|---|
backCoverOption* | boolean | TRUE / FALSE | Enable the automatic behavior to deactivate the back cover panel of a cabinet if it is fully covered. ( Require backCoverPanel [product]) |
backCoverPanel* | product | – | Dedicated parameter for client Range integration. |
High and Wall Cabinets Only
The following parameter is specific to high and wall cabinets.
| Parameter name | Type | Possible values | Function |
|---|---|---|---|
topCoverPanel | product | – | Dedicated parameter for client Range integration. |
Wall Cabinet Only
The following parameter is specific to wall cabinets.
| Parameter name | Type | Possible values | Function |
|---|---|---|---|
bottomCoverPanel | product | – | Dedicated parameter for client Range integration. |
📌 Left, right and back panels are using the same set of parameters: ▪️
xxxCoverPaneldefines the list of available panels; ▪️xxxCoverOptionis automatically set up by the application to enable/disable the panel.
Click Create Parameter in the Parameter panel of the cabinet to specify an xxxCoverOption parameter.

Then create another parameter to specify an xxxCoverpanel parameter.
Click on the product chip to set it as default product.
❗️ Top and bottom panels do not have the automatic removal behavior, therefore only
xxxCoverPanelproduct parameters are required.
Optional Parameters
The following are optional parameters for the cover panel.
| Parameter name | Type | Possible values | Function |
|---|---|---|---|
leftCoverToFloor | boolean | TRUE / FALSE | When the value is set to TRUE, it enables left cover panel to extend to floor and remove the left side plinth associated. |
rightCoverToFloor | boolean | TRUE / FALSE | When the value is set to TRUE, it enables right cover panel to extend to floor and remove the right side plinth associated. |
backCoverToFloor | boolean | TRUE / FALSE | When the value is set to TRUE, it enables back cover panel to extend to floor and remove the back side plinth associated. Also the back plinth option in the plinth option panel will be disabled. |
backLeftCoverToFloor | boolean | TRUE / FALSE | This parameter is dedicated to corner cabinets. When the value is set to TRUE, it enables back left cover panel to extend to floor and remove the back left side plinth associated. Also the back plinth option in the plinth option panel will be disabled. |
backRightCoverToFloor | boolean | TRUE / FALSE | This parameter is dedicated to corner cabinets. When the value is set to TRUE, it enables back right cover panel to extend to floor and remove the back right side plinth associated. Also the back plinth option in the plinth option panel will be disabled. |
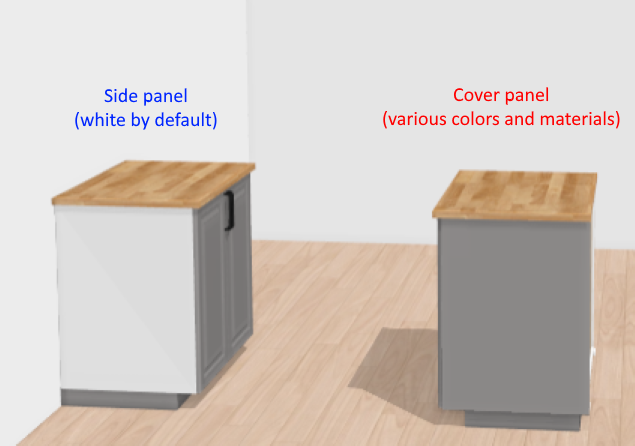
Side Panels and Cover Panels
Cover panels should not be confused with side panels. Side panels are building parts of the box, and not extra pieces of material like cover panels. Thus, changing a side panel impacts the box itself. If the customer does not opt for cover panels, the side panels is usually visible. Side panels are usually a cheaper option than cover panels.