Preparing Models for Variability
The ByMe platform allows the dynamic modification of products.
It means product represented in the experience can be different from the 3D model file.
Range Managers (in 3DCloudByMe or through the API) as well as End-users in the product edit panel of the application can represent differently.
Possible modifications are changing dimensions (through smartscale) and / or changing materials (through publications).
Through the notion of Generic Products, it is possible to create one product per variation, each of them sporting its own reference, description and price. In this case there can be thousands of products defined from a single 3D model.
Material Publications
It is possible to define the material applied to a mesh within a 3DModel as a parameter, which we call "publication".
Thus, changing the material on a product (or a part of a product) can be triggered by a parameter value change originating in:
- 3DCloudByMe or API (Range Managers)
- A Product Rule (dependent behavior)
- The product edit panel of the planning application (End users)
To achieve this result, two steps are needed:
- Assign a publication on editable nodes of the model in Geometry Editor
- Adding the matching material variation parameters in 3DCloudByMe
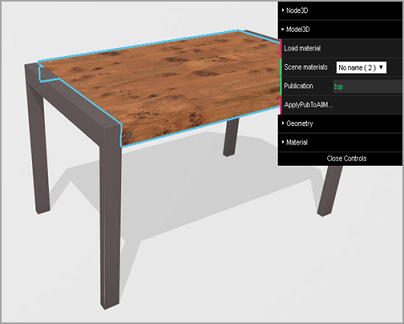
Figure 1-Assigning a material publication to a mesh in Geometry Editor
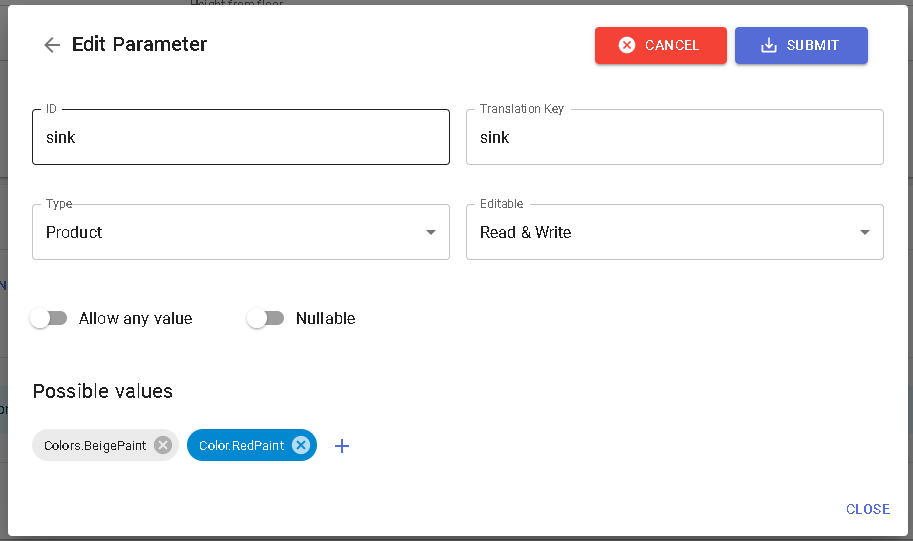
Figure 2-Changing a material within 3DCloud
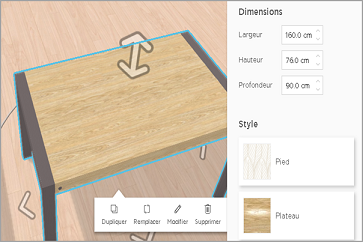
Figure 3-Changing a material in the end-user application
Note:
For publications to work properly and for materials to remain homogenous after change, it is necessary to prepare the assets correctly beforehand.
See Preparing materials for Materials Change (Publications)
Smartscale
The ByMe platform supports the scaling of geometries, either by users in the planner's product edit panel, or by Range Managers through "dimension variations" parameters in in 3DCloudByMe or in the API.
Default scaling is uniform on each axis.
SmartScaling is used to define non-uniform scaling, by designating which areas of a geometry are stretchable and which are not.
When the model dimensions are modified, only these stretchable areas are extended.
Example: Fillets
For any shape with fillets (small radius rounded corners), non-stretchable areas would encompass the fillet in order to keep its radius fixed despite object size modifications.
Example: Table
Non-stretchable areas on X and Y axis would typically be the legs and on Z axis non-stretchable area would be the top.
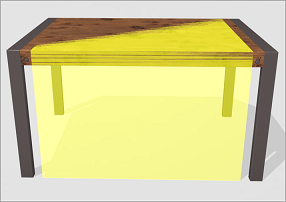
Figure 4-SmartScale on X axis, stretchable area in yellow
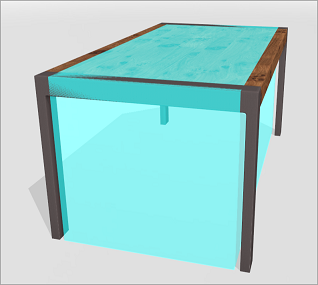
Figure 5-SmartScale on Y axis, stretchable area in cyan
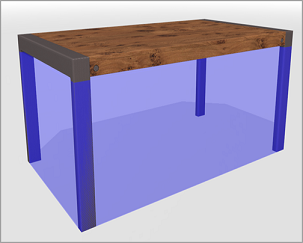
Figure 6-SmartScale on Z axis, stretchable area in dark blue
A model supporting SmartScaling must have mesh edges all along the limit between stretchable and non stretchable areas in order to avoid scaling artifacts.
Meshes which have been decimated / simplified will not guarantee this property and will thus work poorly with SmartScaling.
SmartScaling works independently on each axis.
SmartScaling rules are defined in Geometry Editor.
SmartScaling is incompatible with curved / round shapes.

Figure 7-Enabling users to scale table dimensions (only the wood scales, not the legs)
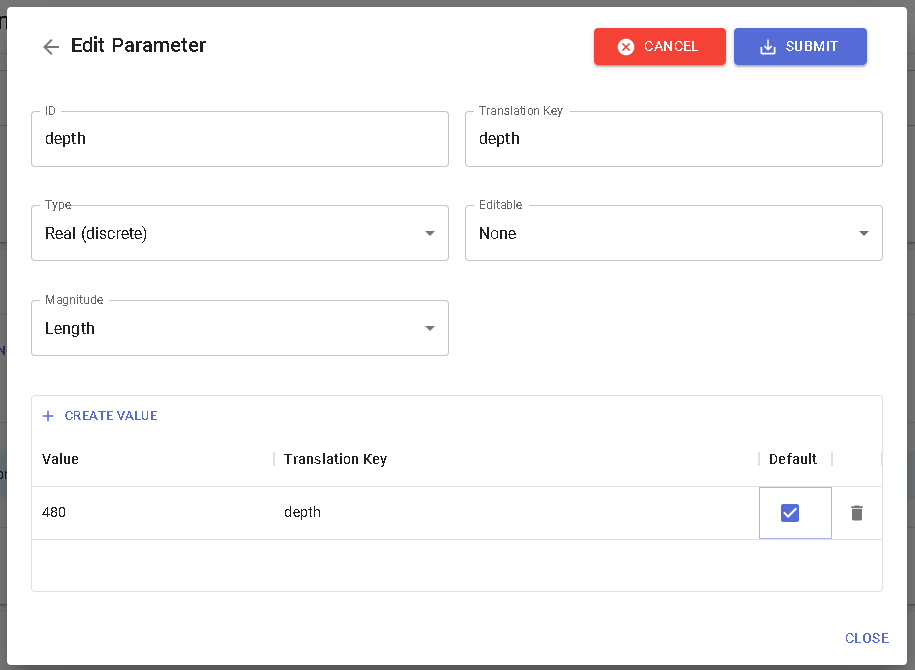
Figure 8-Defining model scaling through Dimension Variations in 3DCloudByMe
Preparing Materials and Geometries for Variability
In traditional 3D artist workflow, material assets are customized for a given geometry.
In the aforementioned scenarios (publications and smart scaling), a geometry can have interchangeable materials, or a material can be applied to several geometries, or to a geometry of unknown dimensions.
In these cases, the ByMe rendering engine dynamically applies materials to surfaces. In order to achieve realistic results, it is necessary to prepare the geometries and material assets differently from the "traditional", material-asset-tailored-to-a-geometry way.
Below are ByMe behavior with their key principles of geometries and materials preparation:
-
Scales materials to physical realistic dimensions:
- UVW scales on the geometry should be set to represent millimeter values. Hence a 600mm long (flat) surface would have U values in the [0-600] range, instead of the usual convention to have UVs values in the [0-1] range.
- UV Operator, defined in the ByMe material, should specify the physical scale of the texture.
Example: ScalingX = 300, is interpreted as the real world size of the texture asset being 300mm (regardless of its resolution); on a 600mm (flat) object, it would be tiled two times.
-
Matches the X texture direction to the U surface direction:
- Have the material assets matched the UVs of the geometry to achieve the desired effect. Simpler cases of mismatch can be corrected by using rotate in the UV Operator without touching the original assets.
-
ByMe material library has directional materials following the X axis.
Example: when viewing the jpg, wood fibers are horizontal.- It is recommended:
- Custom materials also follow this practice, to make it easier to replace textures.
- UVW clusters are oriented with direction U along the largest dimension.
- Exceptions: Isotropic textures, and wallpapers with vertical patterns (the ByMe material library has their textures oriented along the Y axis).
- It is recommended:
-
ByMe performs several optimizations when different surfaces share the same material (even disjoint surfaces). It is a good practice to apply, in the authoring tool, the same material to all surfaces of a model sharing the same material. The benefits are:
- Fast selection of multiple surfaces in Geometry Editor;
- Making a single publication to all these surfaces at once in Geometry Editor;
- Enhanced rendering performance, by reducing the number of draw calls.
-
Rendering engine automatically stretches the UVs of smartscaled geometries:
- Nothing to do in terms of preparing the UVs for this.
Illustrative example:
- A gradient image used as a texture-gradient in the Y direction of the texture file.
- Material scaling set to 1, meaning 1 tile per mm (for the sake of the example).
- UVW mapping respecting the 1 UVW unit per mm.
- Results in the following render, where the texture is indeed looped every millimeter, as shown below.
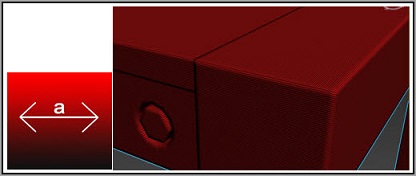
Figure 9-Illustrative Example