Set Up Plinths
If a plinth has been enabled on a cabinet, it will be generated automatically in the kitchen planner when the customer adds the cabinet to her/his kitchen design. The plinth is editable by the customer in the Edit panel of the cabinet.
❗️ Even if there is no dependency with the legs 🔗, decorative legs 🔗 or decorative plinths 🔗 of the cabinet, plinths strongly link to these options.
❗️ If a product is defined with the plinthOption and leg parameters (refer to Cabinets parameters 🔗), the choice for these options in the application will appear as a single option (choose a plinth or legs). In order to be able to modify these parameters independently, the leg parameter should be renamed with something else.
➡️ Click here 🔗 to open the complete sample to define plinths through API.
Definitions
| Term | Definition |
|---|---|
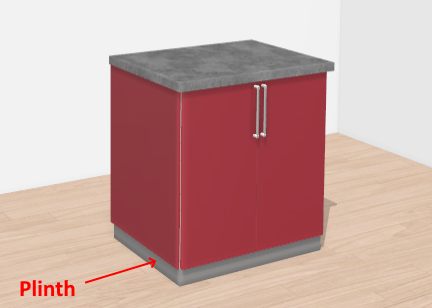
| Plinth | Plinth is the panel that covers the area between the bottom of the base unit and the kitchen floor. Plinths are generated automatically as a linear feature of the kitchen planner. It is also known as a kick plate or kick board. |
| Plinth position type | The plinth could have two different positions to follow the same logic as when the plinth is placed in person by the customer. Possible values are: ▪️ Bound to the leg: 'onLeg' ▪️ Bound to the frame: 'onFrame' ▪️ Aligned with the front: 'onFront' |
| Leg offsets | When plinths are fixed on the legs, the leg offset must be defined. It is the variable distance between the edge of the frame and the legs. Three distances are manageable in the plinth settings: the distance on sides, on front and on back. |
Illustrations
Below are illustrations of concepts regarding plinths that are documented hereinafter.
Base cabinet with plinths
The plinth are generated automatically around the cabinet.
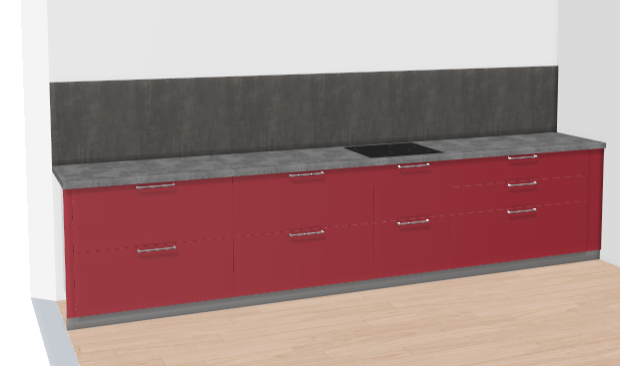
Combination of base cabinets and fillers
The continuous linear is generated automatically along the combination.
Specify the Basic Information
The minimum information required to create a plinth is common to every kind of products.
This is:
- The name: The name will be displayed in the planner (in the Edit panel) and should be available for all languages. If not, the planner will display the name in the fallback language.
- Mandatory information: The product reference, the brand and the product type.
- Product information: This information is not mandatory but highly recommended, especially the short and long descriptions that are displayed in the planner.
- Product representation: This is where you specify among others the 3D resource, the thumbnail and the parameters.
- Pricing: This is where you specify the pricing type (regular, discount...).
❗️ Select your product type carefully because it will trigger the applicative rules: the type is "Plinths".
❗️ Generic plinth product. The plinth can be defined as generic product (with no price) with a list of mapped products (with a price defined). If the plinth is defined as generic product, all parameters in this document must be set on the generic plinth product. The mandatory parameters required in the mapped products are the dimension parameters : width, depth, height (see dimension parameters 🔗 for more details).
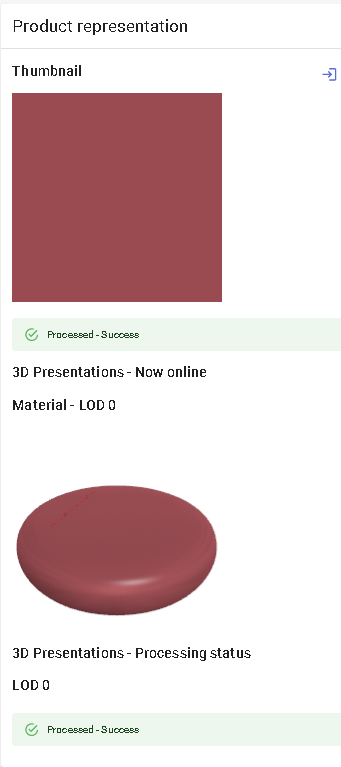
Specify the 3D Resource and the Thumbnail
Plinths are linear products: The required resource is a texture (a .BM3MAT file) and the shape of the plinth is
generated by the planner automatically from the "depth" and "height" values of the product, if not overloaded by a
section product (see below the section parameter).
- Click replace to browse for your .BM3MAT file and add it to the datasheet.
- Click
 next to thumbnailto specify the bitmap file that will be used as thumbnail in 3DCloud and in the planner.
Follow the format and size recommendations.
next to thumbnailto specify the bitmap file that will be used as thumbnail in 3DCloud and in the planner.
Follow the format and size recommendations.
Specify the Dimension Parameters
❗️ Although the .BM3MAT does not have by definition any dimensions, the default sizes of the plinth must be specified in the datasheet. Indeed, size parameters are mandatory, including for plinths.
Click Add variable dimension in the Product representation tab to define the default width, depth and height of the plinth.
| Parameter | Parameter type | Default value | Possible values |
|---|---|---|---|
width | Discrete length | – | [0 ;∞] |
depth | Discrete length | – | [0 ;∞] |
height | Discrete length | – | [0 ;∞] |
❗️
widthis a strictly mandatory parameter used for price calculation.

Define the Option Parameter
The plinthPositionType Parameter
| Parameter | Type | Possible values | Default value |
|---|---|---|---|
plinthPositionType | Discrete variation | onLeg / onFrame / onFront | onLeg |
plinthPositionType defines if the plinth will be generated either on the path defined on the frame of the box or on
the front of the cabinet, or if the plinth will be generated by taking the offset values defined on the top-assembly
into account.
❗️ If
plinthPositionTypeis set up 'OnFront' then the plinth will be automatically moved by using the depth of the first 'fronts' typeID product of the cabinet. Therefore, it is mandatory to check that no sub-assembly (e.g. a drawer assembly) is set with a 'fronts' typeID. For example, avoid using the 'fronts' typeID for a drawer sub-assembly, rather use 'drawers' to avoid that the plinth aligns with the drawers.
Click Add option in the Product representation tab to define the parameter.

The ecoFeeCategory Parameter
ecoFeeCategory has a usage:
- Define to find the same category in the range where the weight of the board lies and to retrieve the ecofee value of that weight.
❗️ This parameter is mandatory to trigger
EcoFeeRule.
| Parameter | Type | Possible values |
|---|---|---|
ecoFeeCategory | string | any string |
The linearWeight Parameter
linearWeight has a usage:
- Define to calculate the weight of linear using length and linearWeight and the calculated weight will be returned
by
EcoFeeRule.
❗️ This parameter is mandatory to trigger
EcoFeeRule. PreciselylinearWeightshould be in kilograms per meter.
| Parameter | Type | Possible values |
|---|---|---|
linearWeight | number | [0 ;∞] |
Overload the Shape via a Section Product
The section Parameter
| Parameter | Type | Possible values | Default value |
|---|---|---|---|
section | Product variation | External dbID | External dbID |
section defines a shape to use for the plinth instead of the default rectangular one obtained via the depth and height
parameters. This section is a dedicated product and defined in a .BMA.
Add a product parameter:

➡️ See Define Plinth Position 🔗 for detailed information on this section BMA.
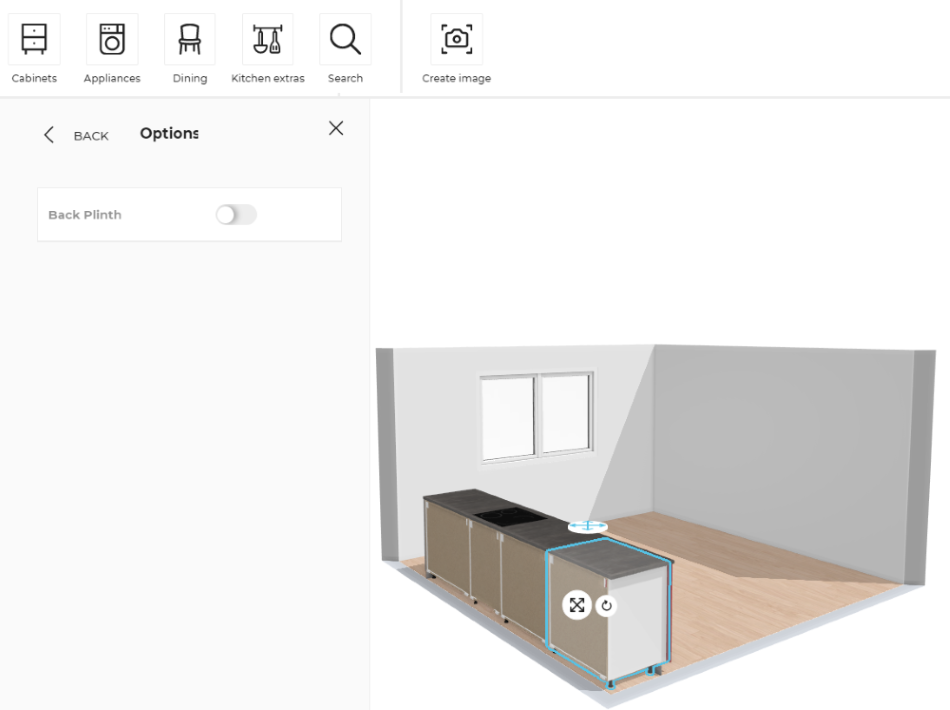
Remove/Add the Back Plinth
The back plinth can be removed or added manually by changing the Back Plinth option in the Options panel.
If the cabinet is against the wall, the Back Plinth option will be disabled since there is no place to add the back plinth. The Options button will not be shown when the leg product is activated on a cabinet.
📌 This option is automatically managed by the Edit panel of the kitchen planner so no input data is required.
Calculation of the Plinth Length
The length of the plinth is based on the width dimension: this parameter is essential because plinths are linear
products and not priced by the unit. In the case of a linear combination of several cabinets, plinths are generated
automatically along the whole cabinets. The pricing depends on the total width of this linear.
The way to calculate the total length of the plinth is also based on the plinthPositionType parameter (see
hereinafter). The computed length equals to the total width of the linear plus 15 %.
If the value of plinthPositionType is 'onLeg', then the offset values (defined in the cabinet top-assembly) should be
taken into account when calculating the length of the plinth.
If the plinthPositionType is 'onFrame', then the plinth will be attached to the box frame and the offsets value will
not impact the calculation.
Example for a two-cabinets combination
Let us take for example a combination of two base cabinets with a filler.
This is an extract of a 2D plan with dimensions in millimeters. Plinths are highlighted with different colors. '600' is the depth of the cabinet and the offset values are parameters defined on the cabinet. The total length is increased by 15%.
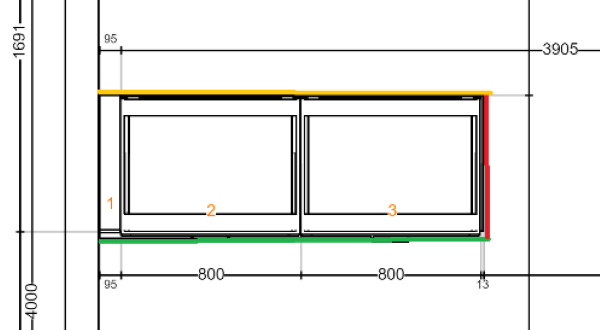
Plinth position is 'onLeg'
| Plinth | Calculation |
|---|---|
| Back green plinth | 95 + 800 + 800 – xLegOffset = 1695 – 23 = 1672 mm |
| Side red plinth | 600 – yBackLegOffset – yFrontLegOffset = 600 - 50 - 100 = 450 mm |
| Front yellow plinth | 95 + 800 + 800 – xLegOffset = 1695 – 23 = 1672 mm |
| Total of whole linear | (1672+450+1672) * 1.15 = 3794 * 1. 15 = 4363.1 mm = 4364 mm |
Plinth position is 'onFrame'
| Plinth | Calculation |
|---|---|
| Back green plinth | 95 + 800 + 800 = 1695 mm |
| Side red plinth | 600 mm |
| Front yellow plinth | 800 + 800 +95 = 1695 mm |
| Total of whole linear | (1695+600+1695) * 1.15 = 4588.5 = 4586 mm |
❗️ Note that the total is always rounded up, never down.
Pricing
Like every product, plinths support different pricing 🔗 types: regular, reduced, membership, etc. Go to the Pricing panel to define the price(s).
📌 The recommended pricing method for plinths is 'linearMeter' or 'linearFeet'.
📌 For generic plinth products, the pricing will use the price informations defined on mapped products.

The calculation and pricing of the plinth in the planner is made as follows:
- Calculation of the computed width: the total linear length increased by 15%.
- Calculation of the number of plinth units by dividing this total length by the
widthof the plinth. - Multiplication of this number of units by the price of one plinth product to get the final price.
Example
(linear length * 1.15) / plinth width = number of units
number of units * price per unit = final price
(3400 mm * 1.15) = 3940
3940 / 2100 mm = 2 units
2 * 50€ = 100 €
Parameters to Add at Upper Level
Plinth option is an indirect product feature. This means that it is not mandatory to list the plinth products on the top cabinet level.
Deploying plinths to the planner requires the following steps:
- Enable the plinth option on the cabinet;
- Define a specific option for dedicated cabinets, if need be;
- Add the plinth product to a catalog;
- Define the paths on the cabinet top-assembly ( See Define Plinth Position 🔗).
Define the Plinth Option
The plinthOption parameter on the cabinet will automatically launch a suggestion of available plinth products in the
planner.
| Parameter | Type | Possible values | Default value |
|---|---|---|---|
plinthOption | boolean | True / False | False |
Click Add option in the Product representation tab of the cabinet to define the parameter.

Define a Specific Option
Even if plinths are priced by calculating their total length, it is possible for dedicated cabinets (e.g. with a
dishwasher or a fridge) to define a particular product added to the item list.
To manage this product, you can define a product parameter nammed specificPlinth on cabinet level (no BMA update is
needed) and the price of this product will automatically be added to the total price. In this case, the total length of
the plinth is reduced.
📌 This case is common with decorative plinths.
| Parameter | Type | Possible values | Default value |
|---|---|---|---|
specificPlinth | Product parameter | External dbID | External dbID |
In addition, if this product is only available for a plinth product, it is possible to activate the specificPlinth
parameter with a product rule of type "chain" using "plinth" publications. In this case it is highly recommended to
apply the product rule only on the needed cabinet.
➡️ See Product Rules for further information.
Applicative Rule
➡️ See also the applicative rule PlinthLegRule to create a mapping between plinth products and leg products.
Catalog Update
To be available in an Application Distribution, it is mandatory to deploy all the plinth products in the corresponding catalog 🔗.