Prepare Products for the Cabinet Editor
❗️ This cabinet editor is an option that depends on company's catalog. If your company sells products as kit to assemble by the customer, this option is recommended; else, if your company sells fully mounted products, this option is not helpful.
By default, when the customer adds a cabinet to her/his project in the kitchen planner, s/he has the possibility to select options and make changes to it via the Edit panel.
The cabinet editor allows the customer to create a different cabinet from the one on the scene by clicking the **Modify ** button at the bottom of the Edit panel.
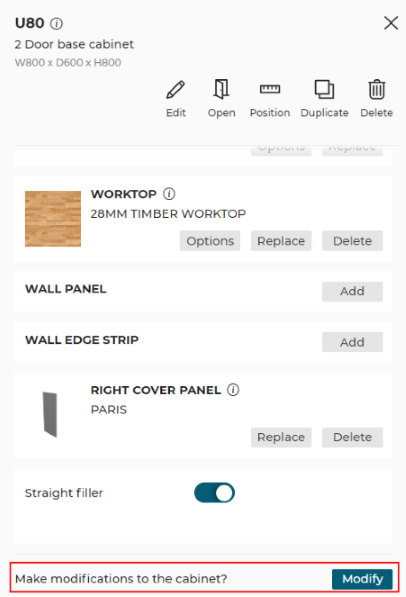
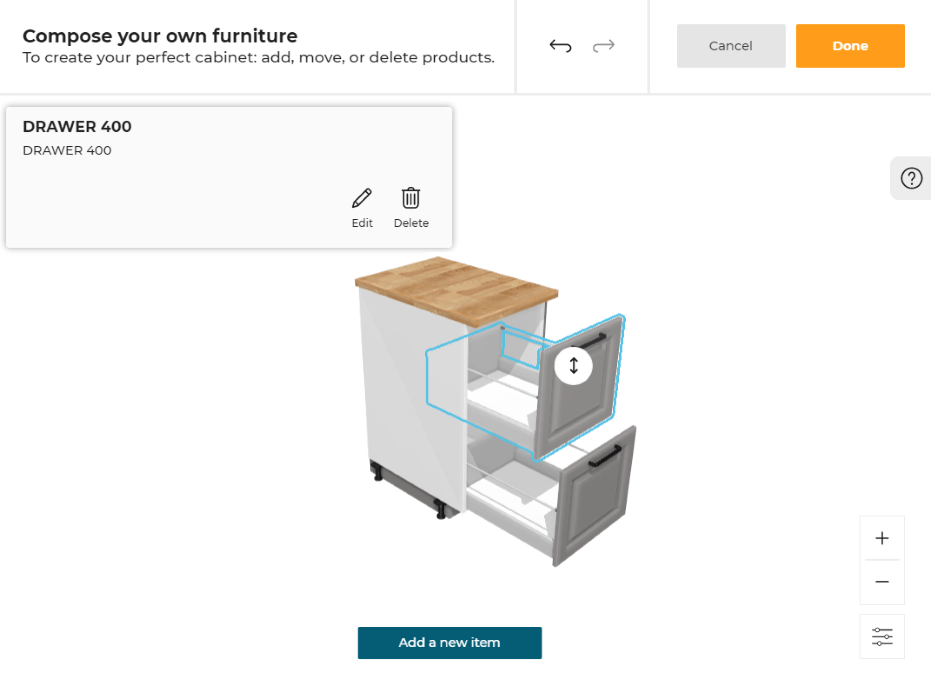
The Modify button launches a pop-in window, representing the cabinet with its front opened by default (door or drawers). "Modify" means that the customer can add, remove or replace elements of the cabinet to customize it.
The cabinet is made of sub-assemblies and each one is editable: by clicking an element, the customer can choose between Edit or Delete. Every option (parameters of the product) available for this element is manageable by the possible values of this option (see management of the option below). These parameters are also visible and editable like any product parameter.
➡️ Click here 🔗 to open the complete sample to prepare products for the Cabinet Editor using the code.
Definitions
| Term | Definition |
|---|---|
| Kitchen Cabinet | A kitchen furniture made of a box, a front (doors and/or drawers) and internal components such as shelves or other drawers. |
| Receiving component | A component, such as a box, that can receive guest components. They cannot be deleted from the cabinet editor. |
| Guest component | Any component that can be placed inside the receiving component, for example a drawer is a guest component. |
| Anchor Point | A specific point defined in both receiving and guest components to define where they match. |
| Tags | Used at the level of the guest component BMA anchor point of one product to define the type of the component. |
| Receiving Tags | Used at the level of the receiving component BMA anchor point to define which list of available component types can be placed at this specific anchor point. |
Illustrations
Below are illustrations of concepts regarding custom cabinets that are documented hereinafter.
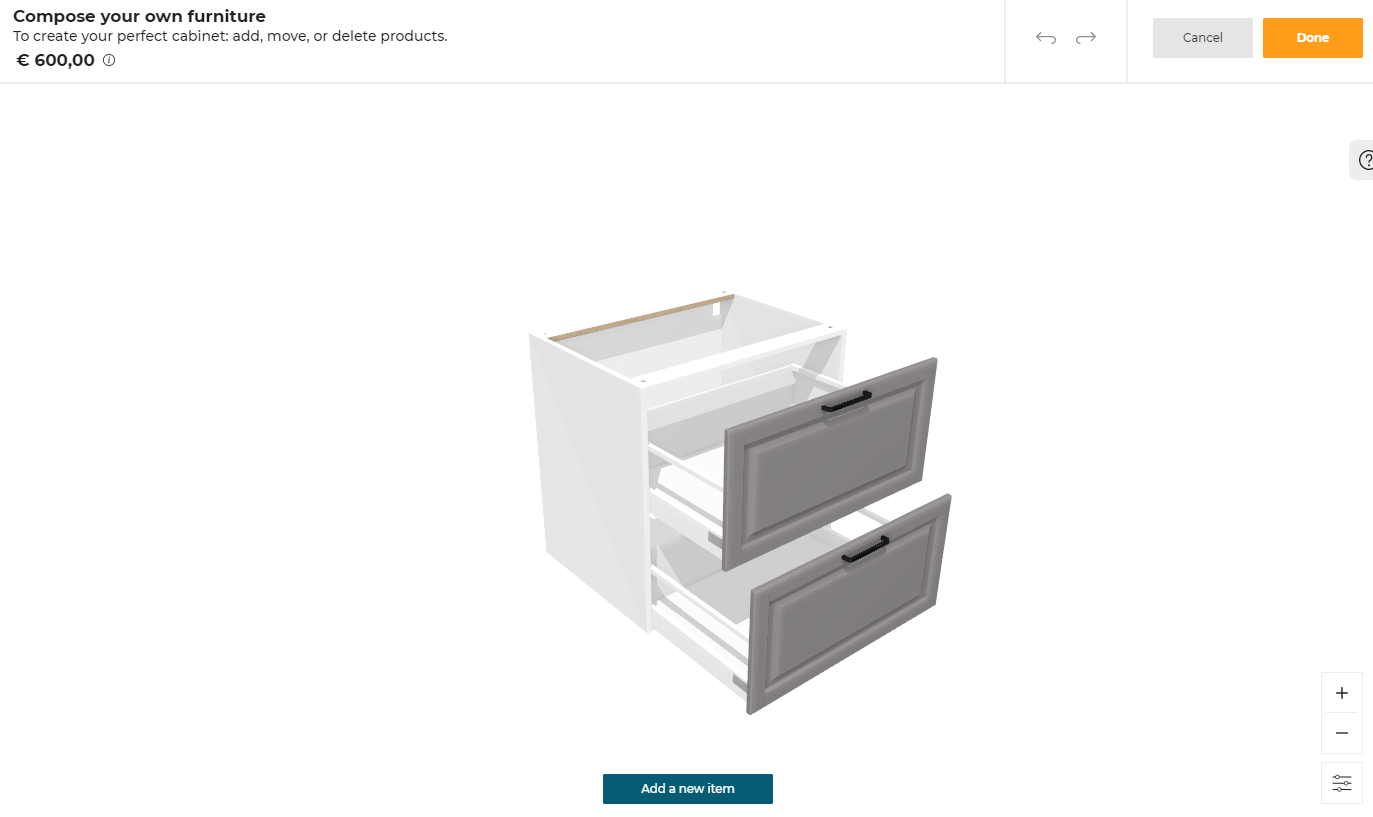
Cabinet with opened, editable drawers
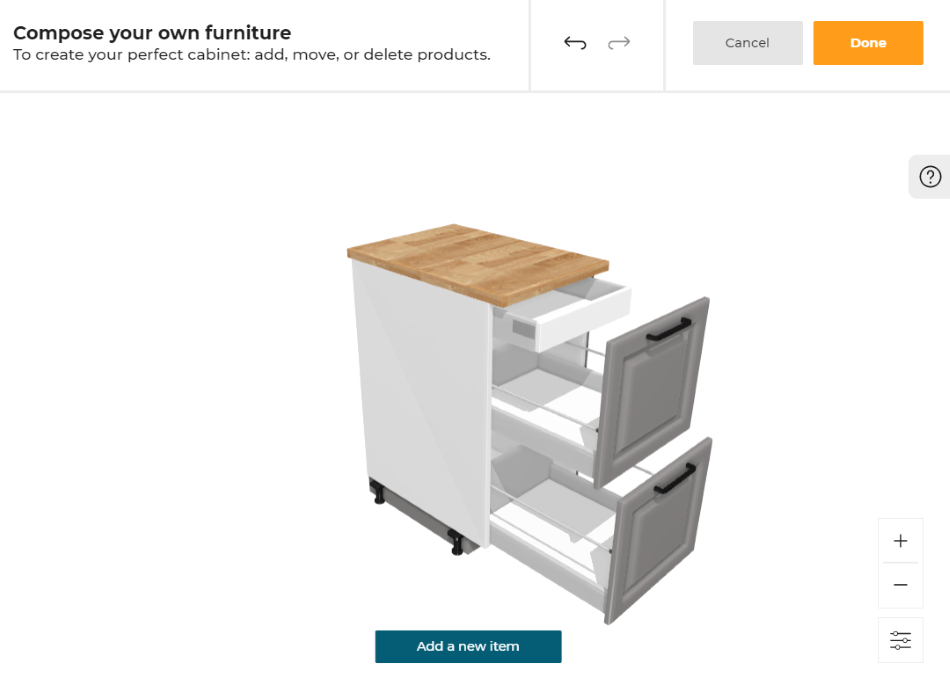
Custom cabinet with a new internal drawer
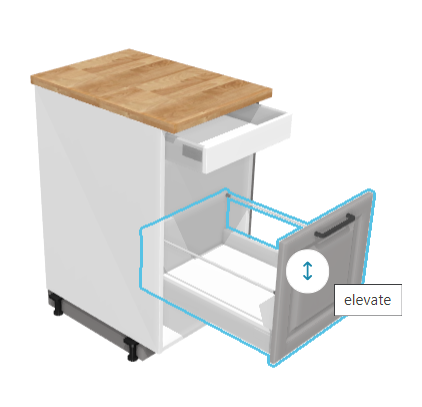
Vertical position of drawer is editable
Feature Implementation
The Modify button is the access point to the cabinet editor.
To enable the cabinet customization feature, there are three prerequisites:
- The cabinet has a box sub-assembly type defined by the tag ID "Boxes"
- This box sub-assembly defines a list of anchor points with received tags (on BMA level)
- Some sub-assemblies products are available in the catalog with a "FurnitureConfigurator" free tag and defines an unique anchor point with a tag (on BMA level).
➡️ See the Assemblies 🔗 for further information on BMA and anchor points.
Example
Let us take as an example a base cabinet with two drawers:
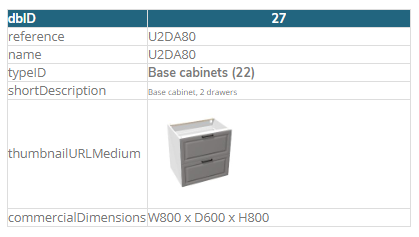
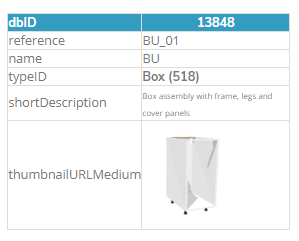
This cabinet has a box sub-assembly (box and legs) with the typeID "Box". This sub-assembly is the receiving component.
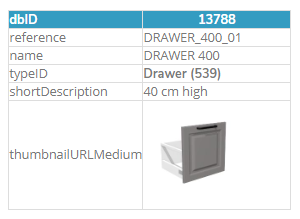
In addition, the cabinet has two drawer sub-assemblies, each one being a guest component.

📌 Sub-assemblies are considered in the cabinet configurator like any other visible product of the planner. Therefore, it is possible to define the configuration of sub-assemblies by setting up the behavior of the parameters in the edit panel (visible, editable) like any other product of the catalog.
Anchor Points and Tags Definition
The anchor points are points defining the link and the possible position between a guest and a receiving component.
Anchor points: The receiving component must have as many anchor points as the possible position of the guest
component.
Tags: Each point of a guest component also has an unique tag to define its compatibility with other points AND each
point of the receiving component has a list of receive tags to define which components are compatible with it.
❗️ This anchor points are set up on the BMA of each product in Assembly Editor 🔗.
Anchor on a Sub-Assembly
By convention the anchor point of a guest component is at the bottom of the assembly, near to the origin point of the axes.
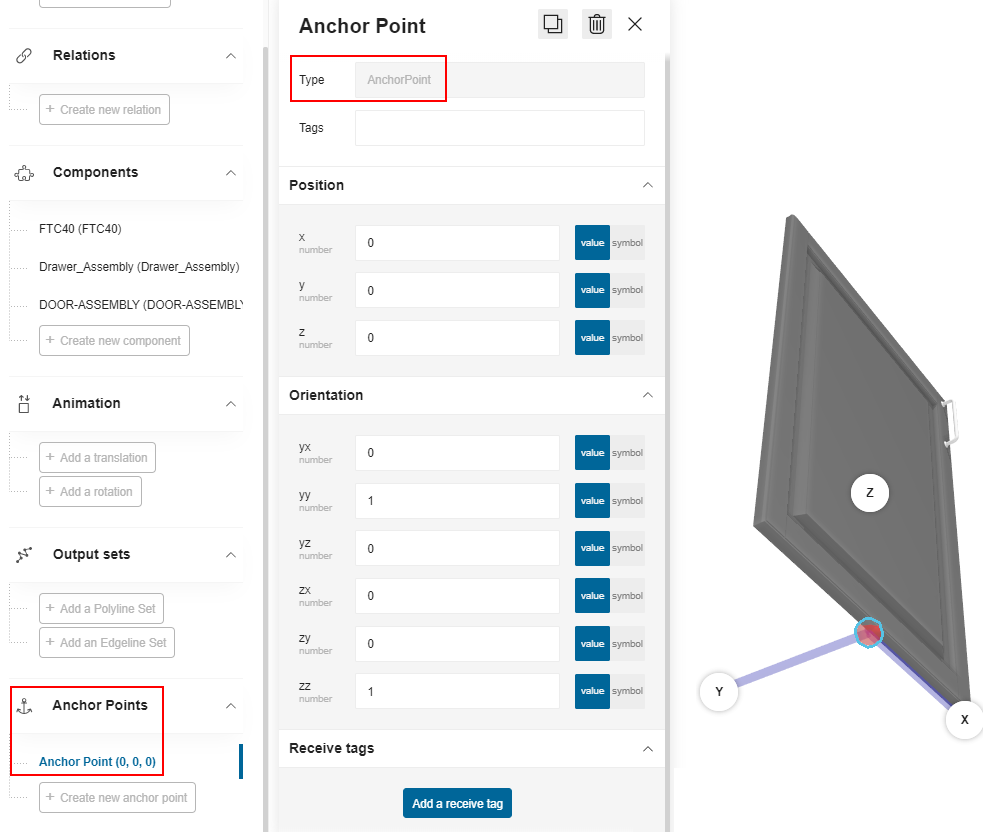
On the drawer sub-assembly below, the anchor point (in red) is placed at the origin point of the assembly and its coordinates are (0,0,0).
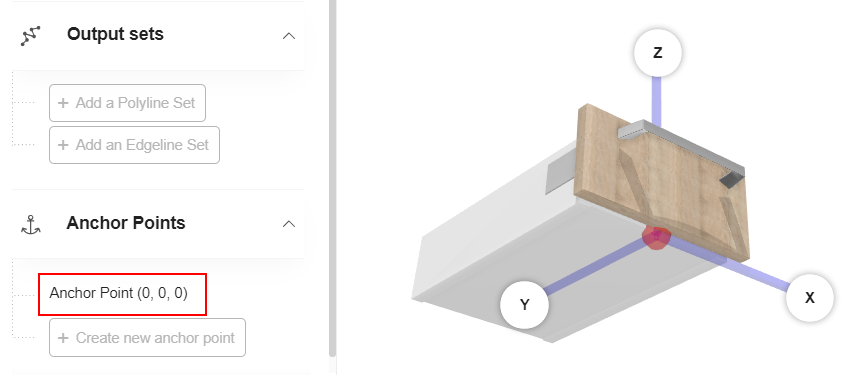
Click the anchor point on the drawer to display its properties: the type is AnchorPoint.

On a guest component such as a front sub-assembly below, the position of the anchor point is also the origin point.
Anchor Point on a Box Assembly
For the receiving component such as the box assembly, anchor points have to be defined for every position that can receive a component.
For example: A box could receive 2 to 8 drawers. The box height is 800 mm and the smallest possible drawer is 100 mm high. In this case, you have to set 8 anchor points on the box assembly, each point corresponding to one possible physical position of a 100 mm high drawer.
Maybe the customer will not customize her/his cabinet with 8 drawers in the planner, but only 2 or 3 but the aim is to define an anchor point system that can allow every possible component to be placed inside the box.
In this case, the origin point of the axes is centered on the bottom of the box and the anchor points are centered on the box front. The coordinates of the origine anchor point is X:0, Y:300, Z:80. All the other points are defined from this point, the first next point being 18 mm higher, which corresponds to the thickness of the box bottom panel.
The illustration below shows how anchor points should be defined.
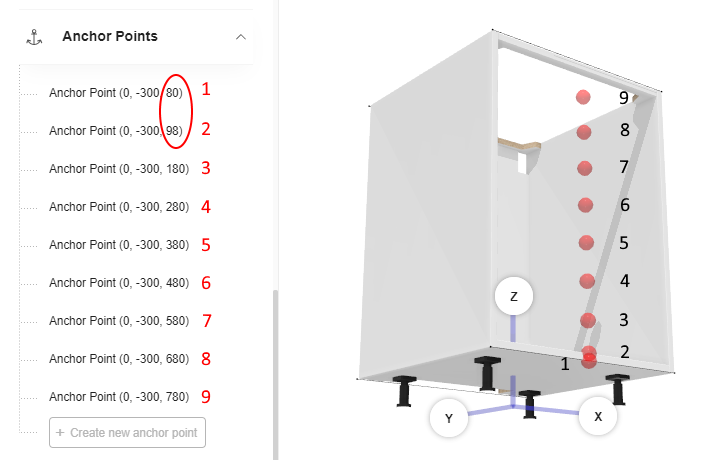
Point 1 is the first point used to receive fronts and drawers on the box.
In Assembly Editor, this original anchor point must be set up as follows:

❗️ Like the parameters of the assembly, anchor points can be defined with relations too to keep their positions on the box even if the
legHeightvalue changes when the customer changes the height of the box legs.
Tags
For the receiving component, the tags section defines "received tags" to list all the guest components that are compatible with the box at this anchor point.
For example, the list of possible components for the first point can be defined as follows:

The list may be different for all the other anchor point (point 2 to 9).
❗️ The box will be able to receive all these components at this anchor point only if there is enough space available to place this component. See below Space Management 🔗.
Example
The list of received tags for the point 1 contains various drawers and doors, while the list of tags for the point 2 only contains a shelf and two different internal drawers.
This means that point 1 is for the doors and drawers exclusively, and that point 2 is for internal drawers and the shelf only, as illustrated below.

On this illustration, the drawer is placed with the bottom of the drawer front exceeding 18 mm down (point 1) and the shelf or internal drawer are flat (point 2):

This 2 points allow to perfectly align the drawers and the shelves with the bottom of the cabinet.
For the upper anchor point (9), the list of compatible components is limited to shelves or 100 mm high drawers because there is not enough space available (100 mm) from this point 9 to receive a 200 mm high drawer.
Add a Free Tag to the Product
To be usable as a possible sub-component in the Cabinet Editor, components having an anchor point must be identified
with a dedicated free tag at product level. This free tag is FurnitureConfigurator.
In 3DCloud, go to the Product information tab and specify FurnitureConfigurator in the Free tags text field.

Space Management
Space management includes empty space due to a component that have been removed or not enough space to place all the components wished by the customer.
Cabinet with Empty Space
In the following case, the cabinet is not full and there is an empty space between two drawers. This triggers the button Add a new item.
By default, the new component will be placed at the first available top anchor point: the code will browse every anchor point from top to bottom of the receiving component until it reaches a free anchor point.

Resize a guest component
This section apply to all cabinets but it is especially useful for corner cabinets guest components which require specific resize (shelf) or are non resizable (carousel).
When inserting a new item, we resize the dimension of the new guest component in order to make it adapted to the dimension of the receiving component. The resized dimension include the width and the depth.
Resize width
By default, we resize the width of the guest component only if it is a door, a shelf or a drawer (which means it has
closed tags Doors, CabinetShelves, Drawers or Fronts). You can configure the business
rule CabinetComposerAdjustableElementsRule
to customise the elements which need to be resized on width.
By default, the resized width value is the width of the receiving component (the box assembly). If this is not relevant for a specific configuration, the value of X field in Available Space can be used instead. In such cases, the resized width value depends on the value of X field in Available Space defined on the anchor point shown as below.
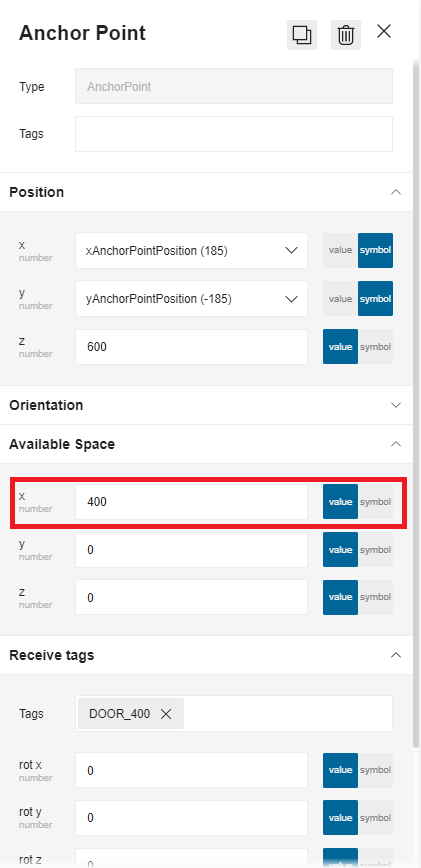
If the value is valid and it is compatible with the possible values of the width parameter of the component, then the resize will be done based on the constraint of available space X. For example before, the door component "DOOR_400" will be resized to 400 on its width.
If the value is 0, then the resize will be done by using the width of the receiving component (the box assembly).
Resize depth
By default, the resize on depth will be done only if the guest component is a shelf or drawer (which means it has closed
tags CabinetShelves or Drawers). You can configure the business
rule CabinetComposerAdjustableElementsRule
to customise the elements which need to be resized on depth.
By default, the resized depth value is the depth of the receiving component (the box assembly). If this is not relevant for a specific configuration, the value of Y field in Available Space can be used instead. In such cases, the resized depth value depends on the value of Y field in Available Space defined on the anchor point shown as below.
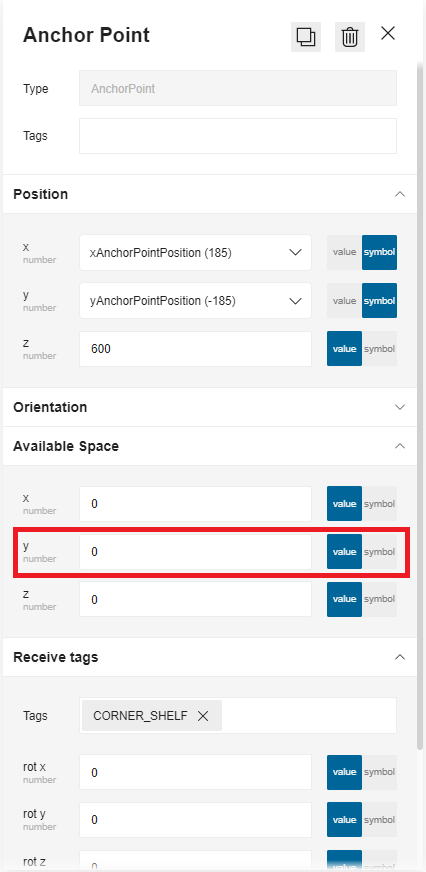
If the value is valid and it is compatible with the possible values of the depth of the component, then the resize will be done based on the constraint of available space Y.
If the value is 0, then the resize will be done by using the depth of the receiving component (the box assembly). For example before, the depth of the shelf component "CORNER_SHELF" will be resized to the depth of the box assembly.
Note:
- A valid value is any positive value that is not 0.
- If a value is not consistent with the possible values of a component, then the component won’t be displayed as suggested item to add.
- If a component is compatible with several anchor points when it is inserted, and if an available space on a specific axis has been defined with different values on those anchor points, then the highest value will be used as resize dimension by the component.
Non resizable component
If a guest component is neither a door, a drawer nor a shelf, it will be considered as a non resizable component. So its
dimension will not be resized when adding to the receiving component. For example, a carousel component which has the
closed tag Accessories will keep its original dimension when attached to the anchor point of box assembly.
Elevate a Component
The customer can move up or down a component along the anchor points, if there is empty space above or below it. Clicking the component displays the Elevate option.
However, the application will limit the movement of the guest component to the possible and available anchor points of the receiving component. In our example, there is a 200 mm high drawer at the top of the box and the available space is only 200 mm. Thus, the application will allow only the component with the corresponding tag which height is less than or equal to the available space: 200 mm.
Non-visible products
Some types of products are not visible in cabinet editor, for the purpose of making it clear for users about what is priced when seeing a price in the cabinet editor. Typically, the linears (for example: worktops, plinths, etc.), the legs, the cover panels and the operations are defined as non-visible products since they will not be priced neither.
It is important to make sure you define the correct "Type" type closed tags(as shown below in list) on products, so that they will not be displayed in cabinet editor. Here are the list of closed tags which are considered as non-visible products in cabinet editor.
- CoverPanels
- Legs
- Operation
Replaceable-only products
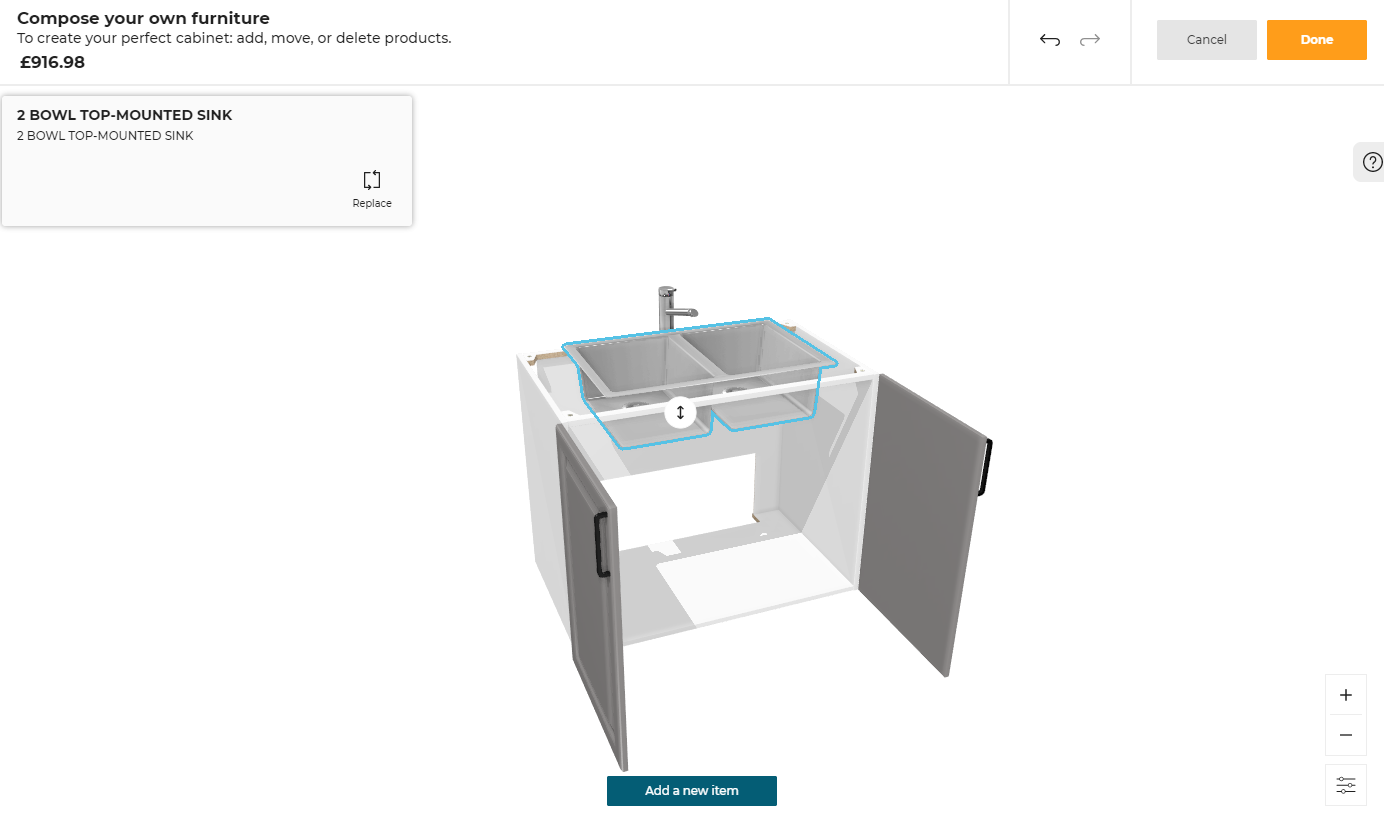
Appliances such as sinks, taps are selectable, replacable and not deletable in cabinet editor. When clicking on these appliances products, it will display a product panel which contains only the replace menu button.
For products which contain the closed tags shown in list below, we identify them as replaceable-only products in cabinet editor. It is necessary to make sure you define the correct "Type" type closed tags(as shown below in list) on products which belongs to appliances. Here are the list of closed tags which are considered as replaceable-only products in cabinet editor.
- Cooktops
- Dishwashers
- Dryers
- Faucets
- Freezers
- Hoods
- Microwaves
- Ovens
- Refrigerators
- Sinks
- Washers
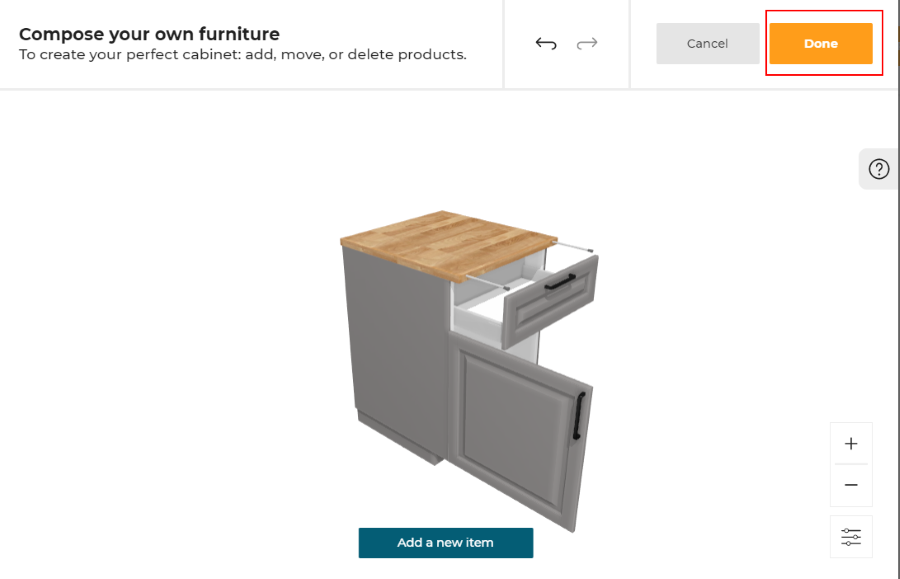
Result
When the customer is satisfied with her/his cabinet customization (in our example, two drawers have been replaced with a 60 cm high door), s/he can validate the changes by clicking Done on the top right corner of the pop-in.
The ID of the cabinet changes to reflect the customization and becomes CUSTOM PRODUCT, which is a generic ID.
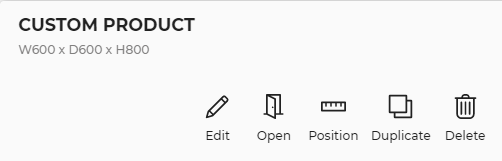
The resulting parameters available in the Edit panel of the new CUSTOM PRODUCT will be the following:
- Linear parameters (worktop, wall-panel, plinths, etc.)
- Parameters of the box sub-component (i.e. the sub-component with the type "Boxes"); this includes typical parameters like cover panels for example.
All the other parameters cannot be edited in the cabinet editor anymore, as the product is now a CUSTOM PRODUCT.
📌 Parameters of the box sub-component are kept because they cannot be edited in the cabinet editor.
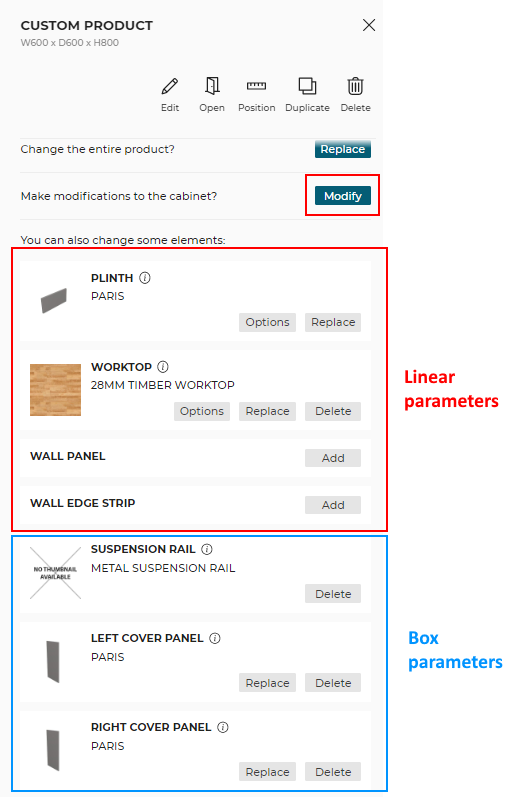
Moreover, the Modify button has moved to the top of the Edit panel, because it is now the best way to edit the cabinet.