Packshot studio
Packshot are image produce from rendering in high quality a product in a scene template.
Access
First of all, Packshot studio is a product that needs to subscribe to an offer in order to access it. Then, credits are allowed by legal entity in order to produce packshots.
Packshot studio is accessible through 3DCloudByme
Generate Packshot
Go into Packshot studio. From there, you will have access to 3 dashboards : Packshots, Order and Scene Templates. In order to generate packshot, go into Packshots
Packshot Dashboard
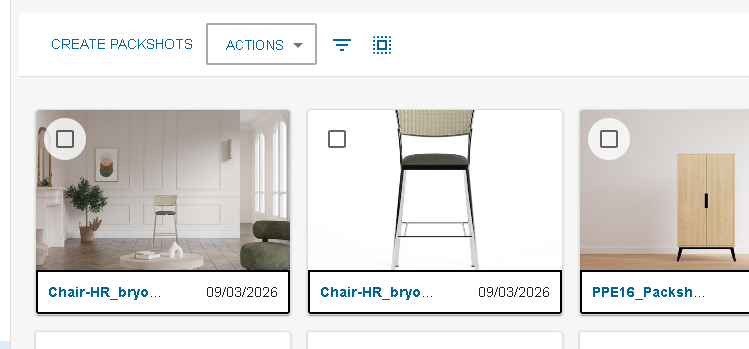
If you have packshots already created, you will be able to browse them from here.

A filter by order id and product id is available to find the one you need.

You can select your packshots in order to export them by select the checkbox on the cards or by using the select all helper.

The export button is under the Action button. The export will gather the packshot images and put them into a zip file.

To start packshot creation, you can go into the create packshot button.
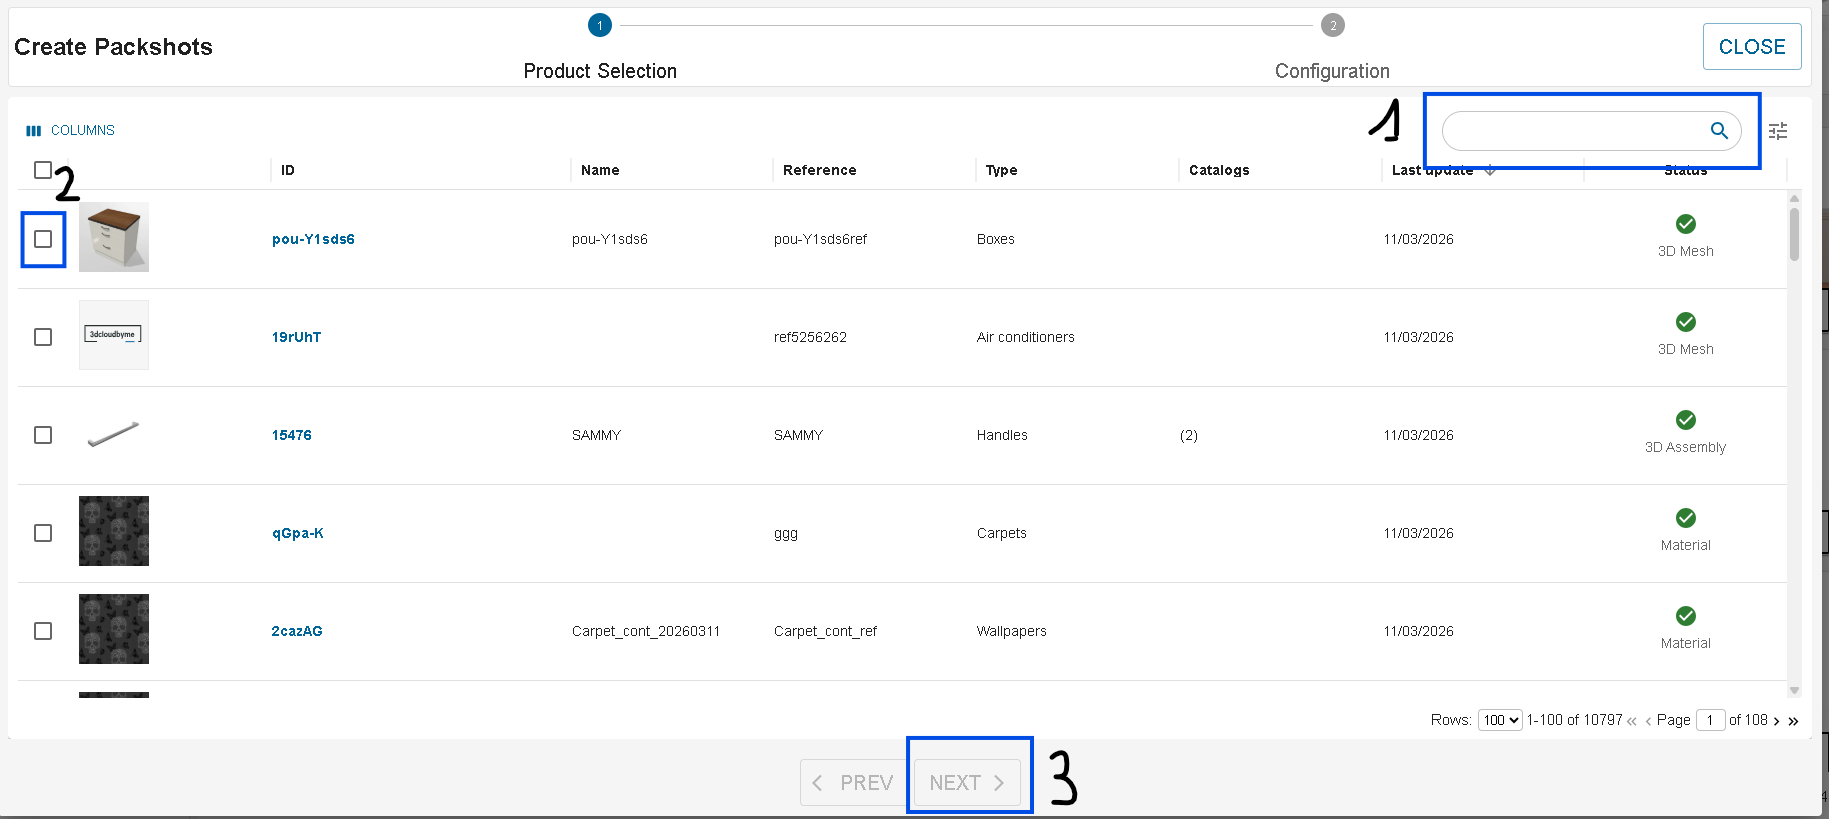
It will open the packshot creation dialog which have 2 steps.
The first step is to select the product you want to create image with. From this step, you will be able to use the search (1) to find the products you want and select them by clicking on the checkbox (2). After you selection is done, click on next (3).
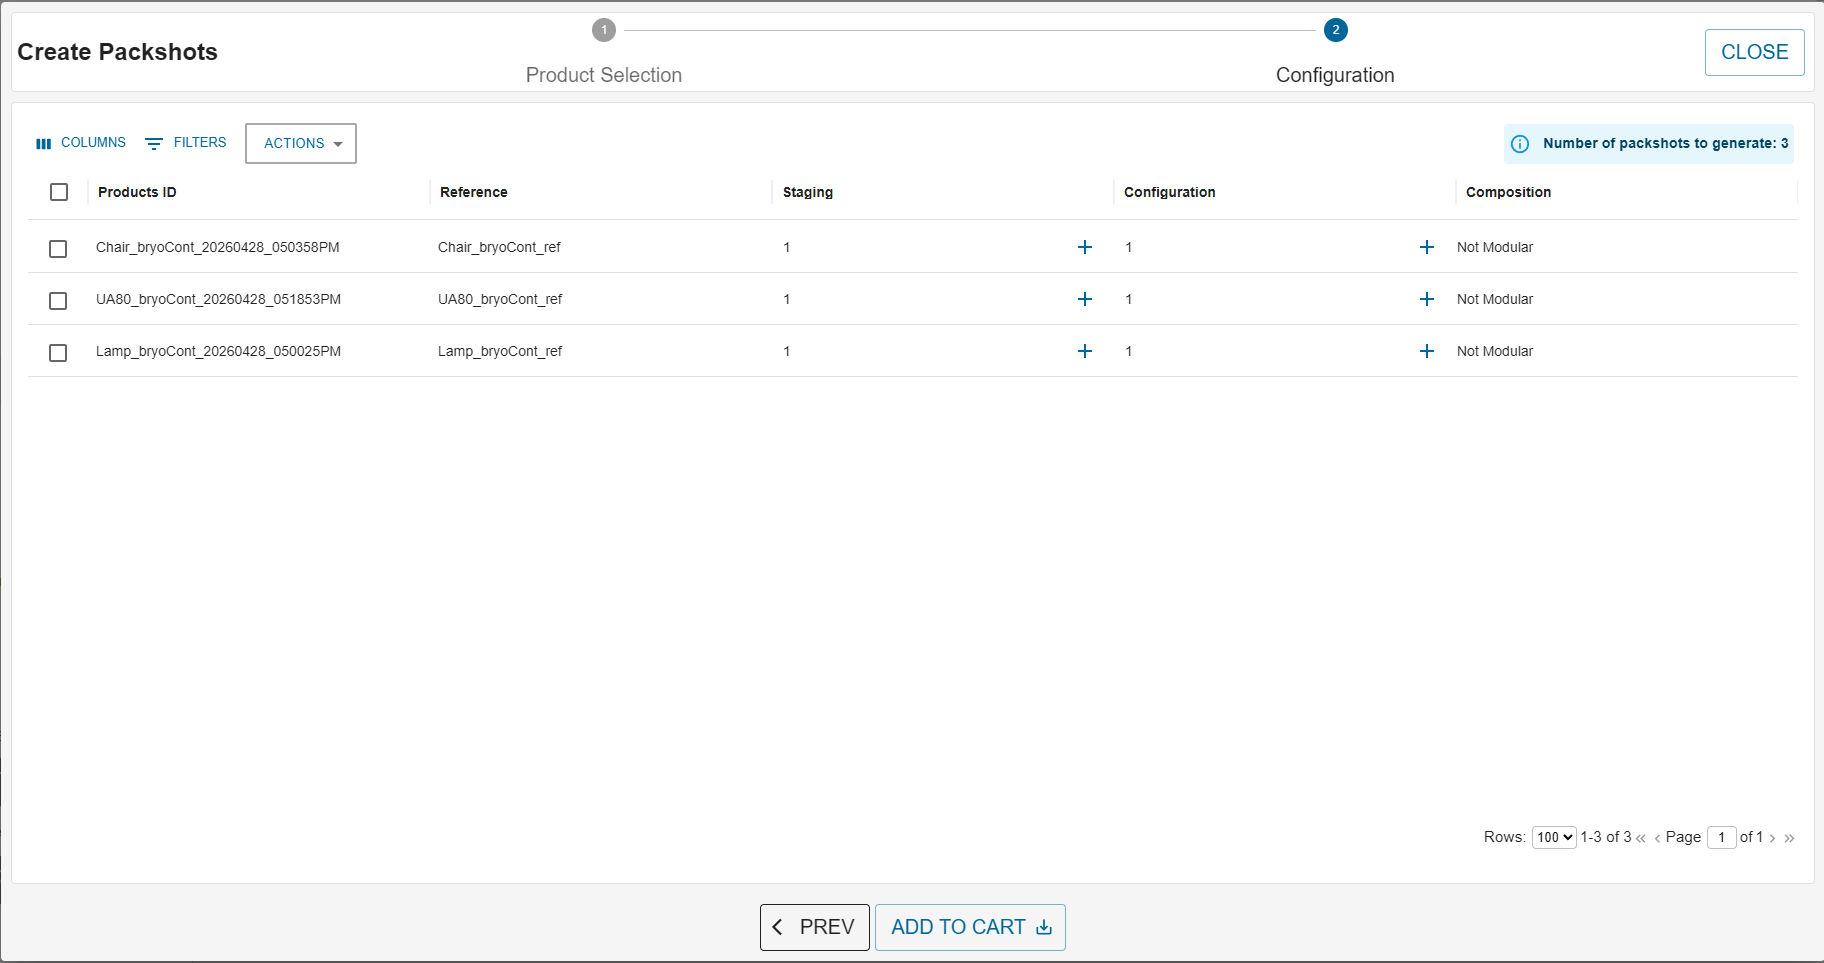
The second step is here for changing the configuration and the scene templates in you which you want your product to be rendered.
Staging choice
On the Staging column, when you click on the + icon, you will be able to select the staging in which you want to render your product. For each staging selected, this will create a different packshot.

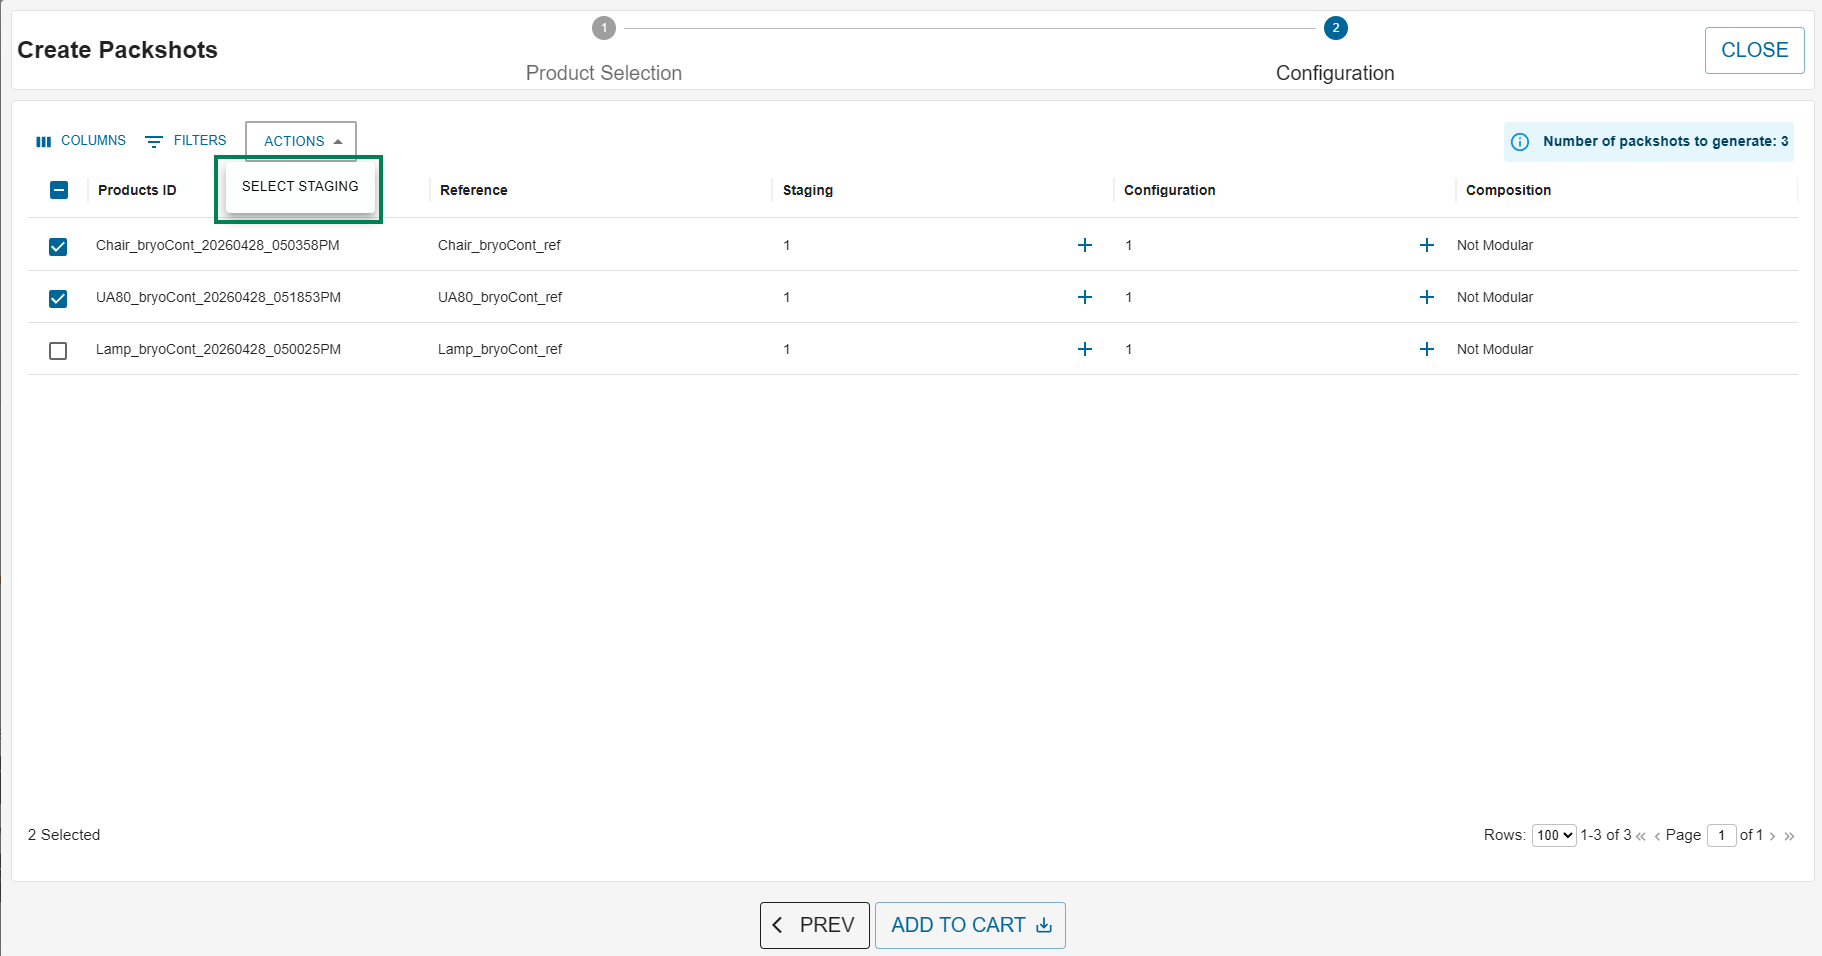
You can perform batch staging selection also. For that, select the products to which you want to apply multiple stagings. Then, click on Actions button and select the "SELECT STAGING" option.
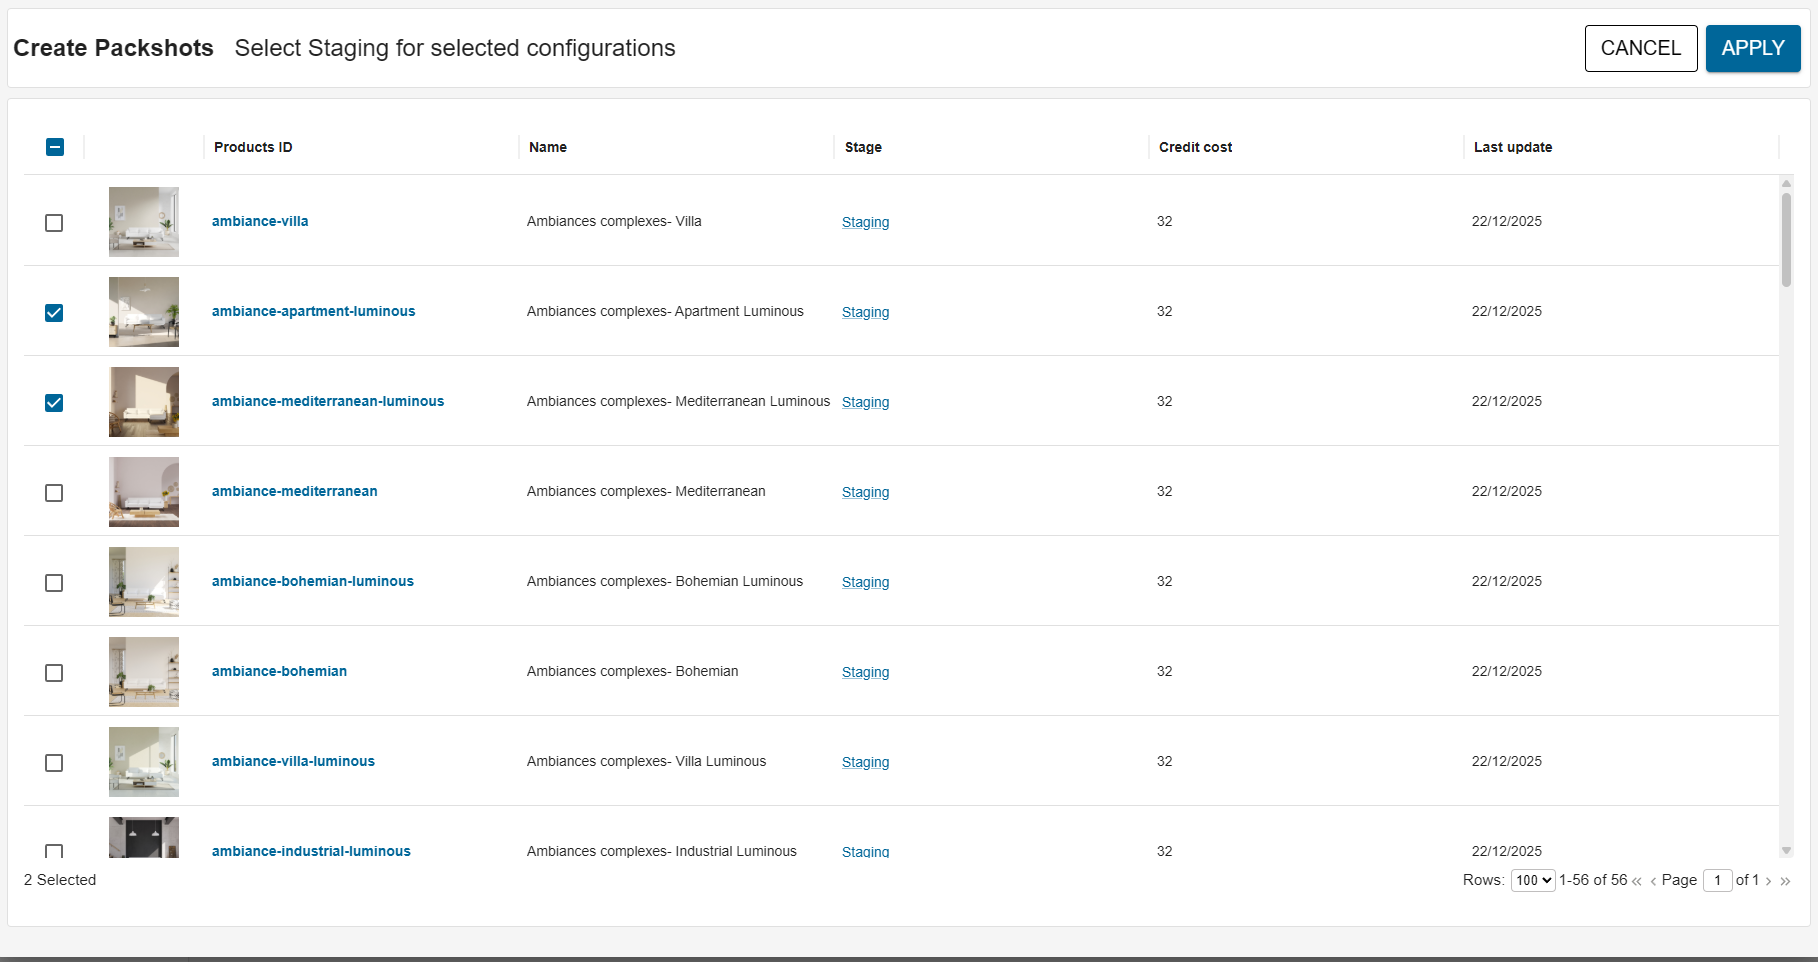
Next, staging selection dialog will be opened. Select the stagings and click on Apply.
When you apply the stagings, the staging will be applied to selected products.
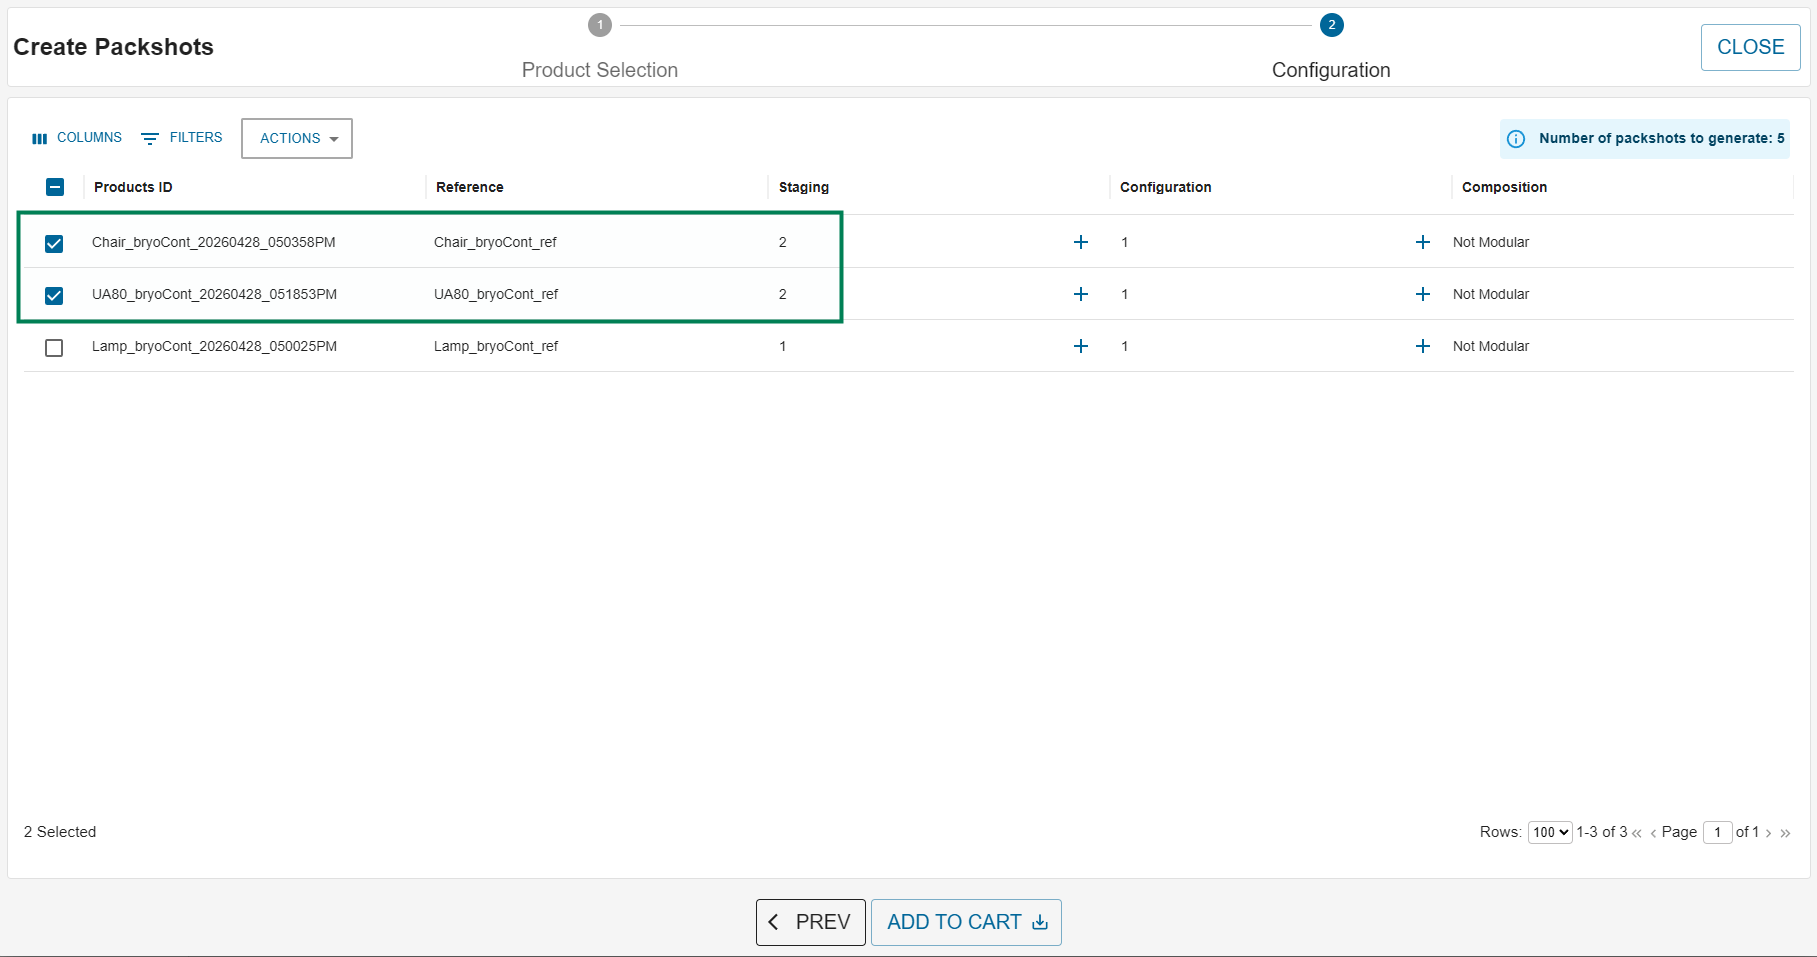
Note: Previously added stagings for those products will be intersected with newly added stagings.
Configuration choice
On the configuration column, you will be able to select the configuration you want to use for your product by clicking on the + icon.
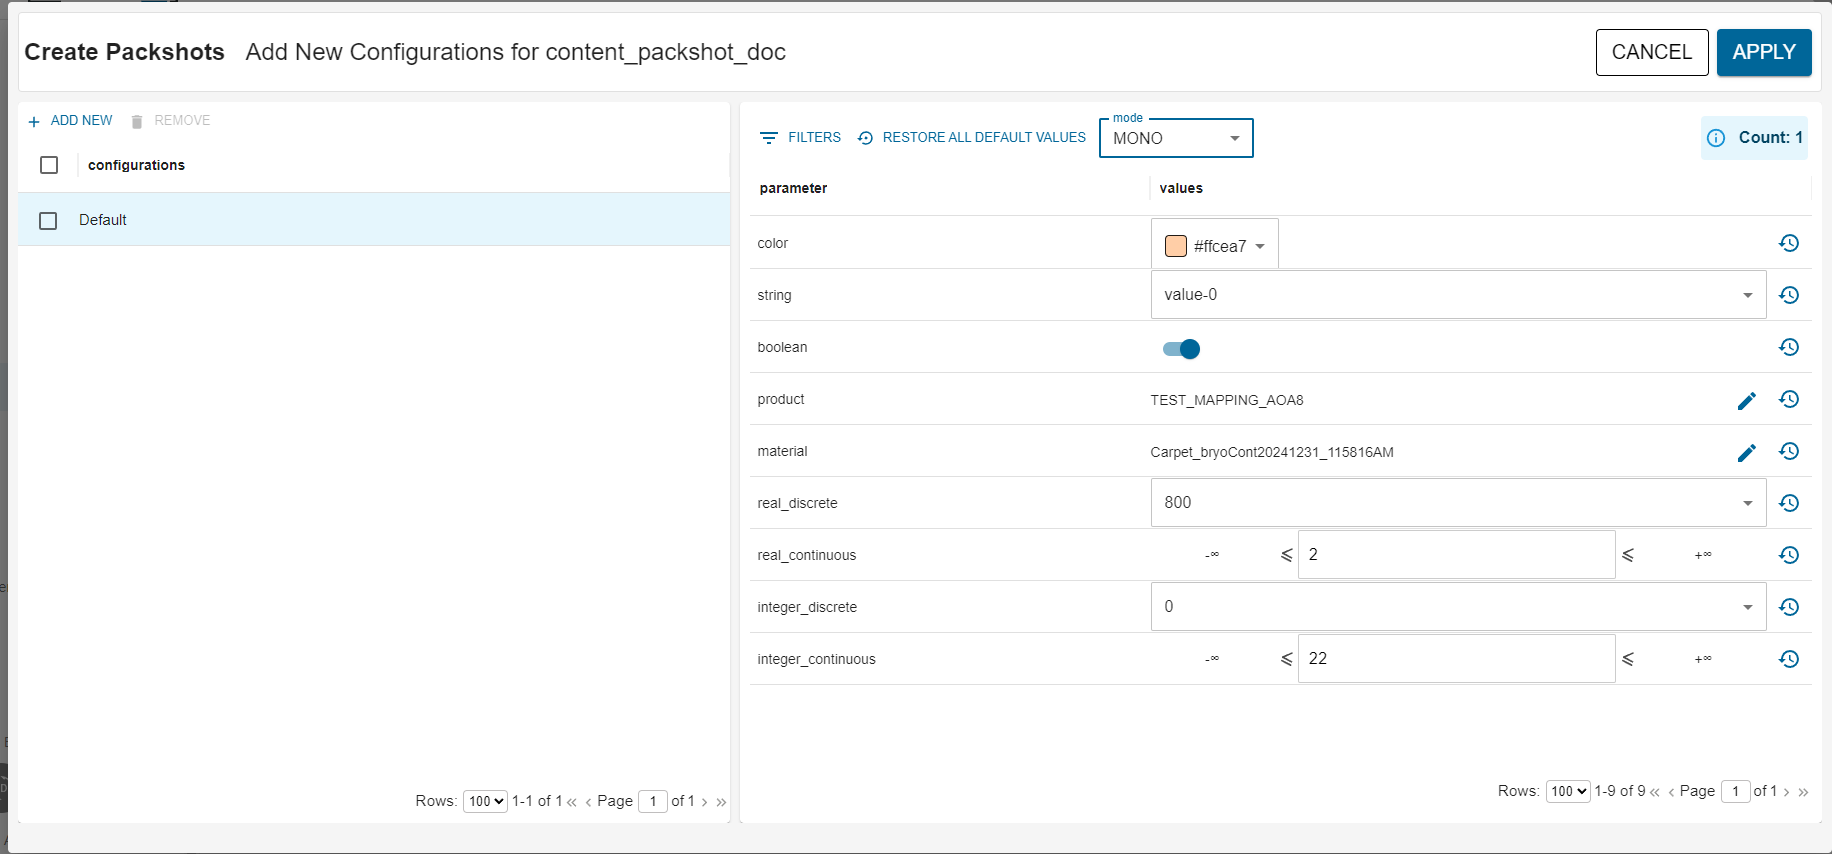
Clicking on "+ Add New" will add a new configuration duplicating the configuration you are currently viewing. Once you do so, the new configuration created appears in red as it is the same as one already created. Change it to a unique configuration and then you can save your modification by clicking the Apply button.
Modifying a Configuration
- Select the desired configuration in the left table.
- The related product parameters appear on the right:
Batch creation of packshots
- When several packshots differ only by a few parameters, you can define all required configurations at once directly in the Packshot creation dialog.
- According to the parameter type, adjust the value you want the product to be rendered with.
- Note: depending on the product, changing a parameter does not always produce a visible 3D modification in the render.
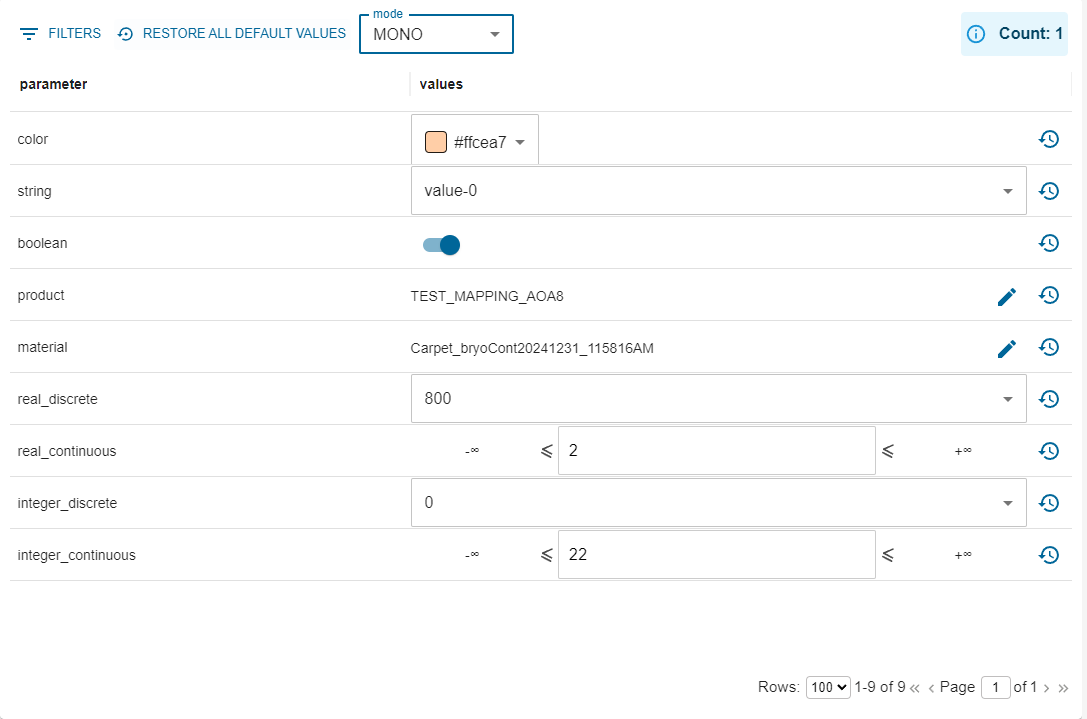
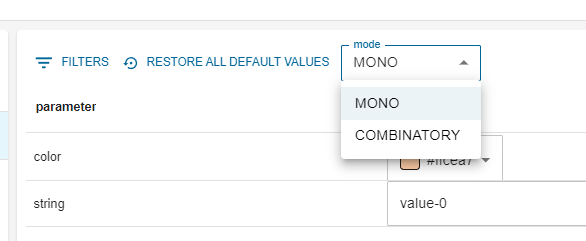
Mode selection (available at right hand table action area)
| Mode | Description |
|---|---|
| MONO (default) | Standard single value mode. |
| COMBINATORY | Allows selection of multiple values per parameter; the system will combine them automatically. |
Parameter editing in COMBINATORY mode
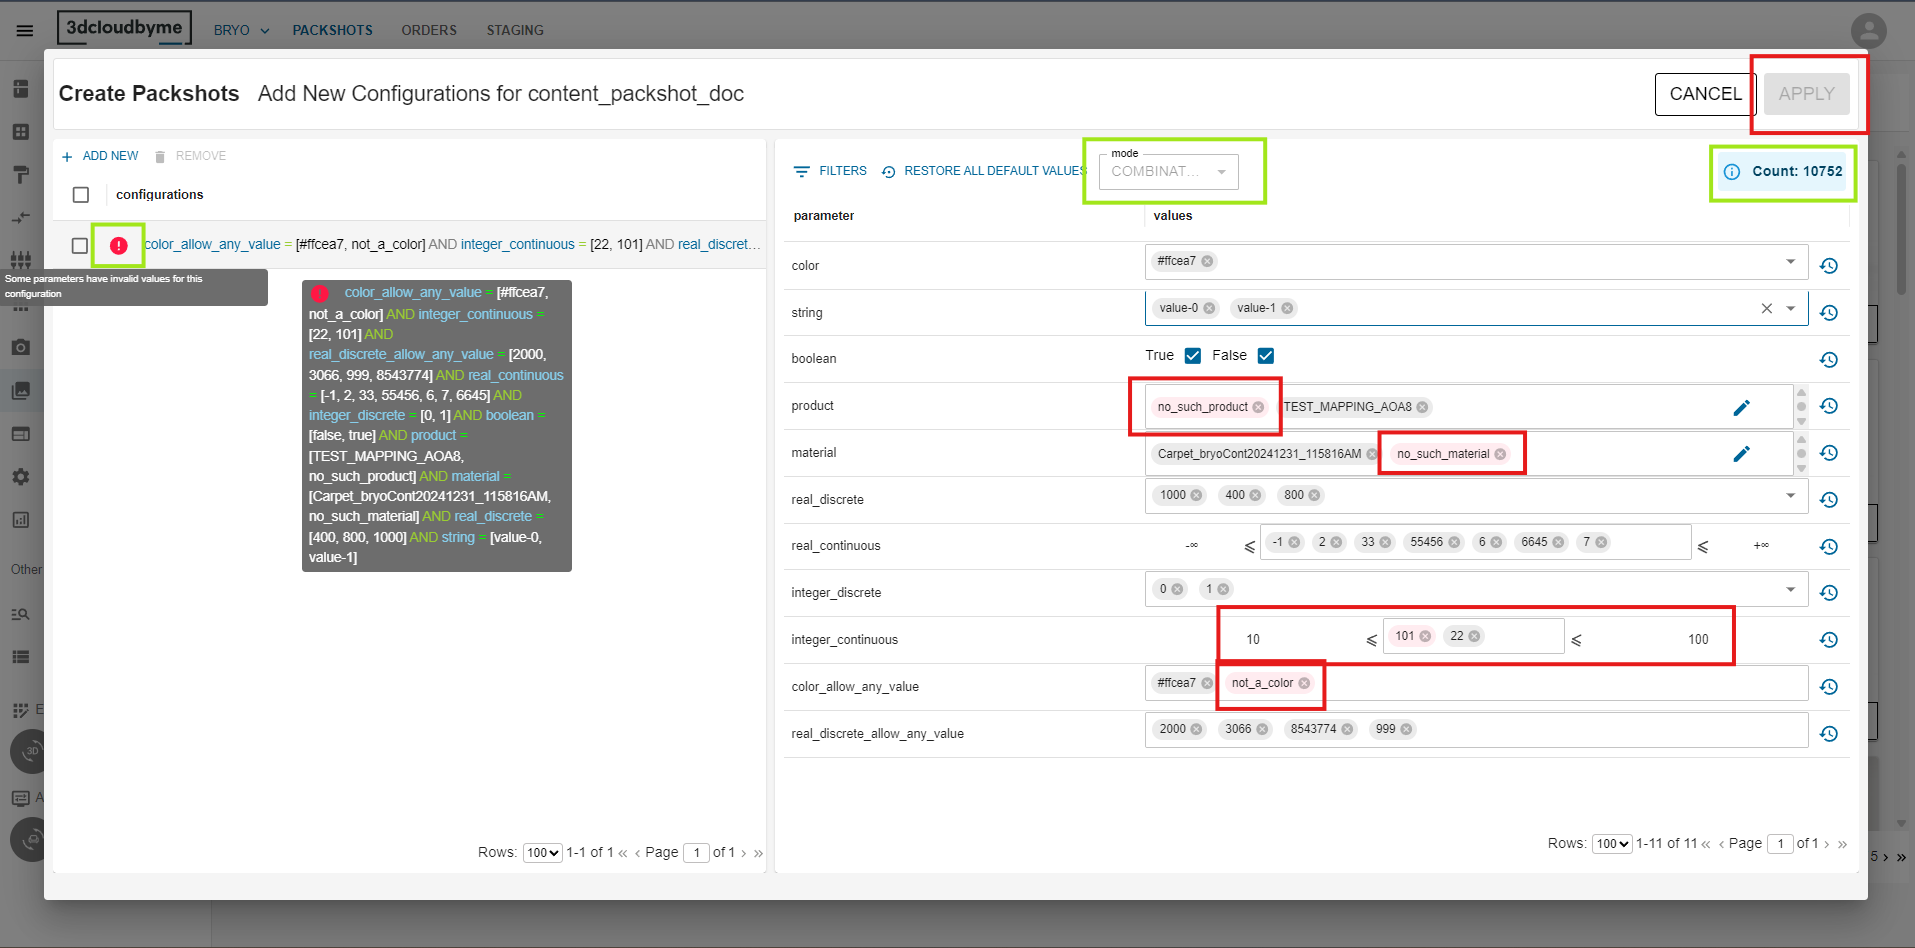
- Integer, Real, String, Color: an autocomplete field that accepts a list of values. If the parameter has a limited set of possible values, the autocomplete is pre populated; otherwise you may type any values (For parameter having allow any value flag true).
- Boolean: two checkboxes; you can tick true, false, or both.
- Products and Material: an autocomplete field that accepts a list of product and material id's. Also, an edit icon, on clicking the icon, it opens the product or material selection dialog to add items.
- Invalid entries (e.g., a non parsable color or a numeric value outside its range) are highlighted with an error tooltip, and the corresponding inner chip turns red. Also, left table will show red alert in case of any invalid entries with tooltip and Apply button will be disabled.


- All possible combinations i.e. Count will be displayed at top right of the tight table.
- When a parameter holds several values, the left hand table shows the condition with IN instead of =, e.g.:
| width IN [500, 600] AND backCoverPanel IN [true, false] AND handle = handle1 |
|---|
- Generating configurations
- After confirming, the system creates every possible combination of the selected values and adds them to the packshot cart.
- A built-in deduplication mechanism guarantees that identical combinations are not added more than once.
For each configuration, this will generate a different packshot for your product
- Click on Apply to save your modification.
- Then click on add to cart when you are satisfy by the staging and configuration choice.
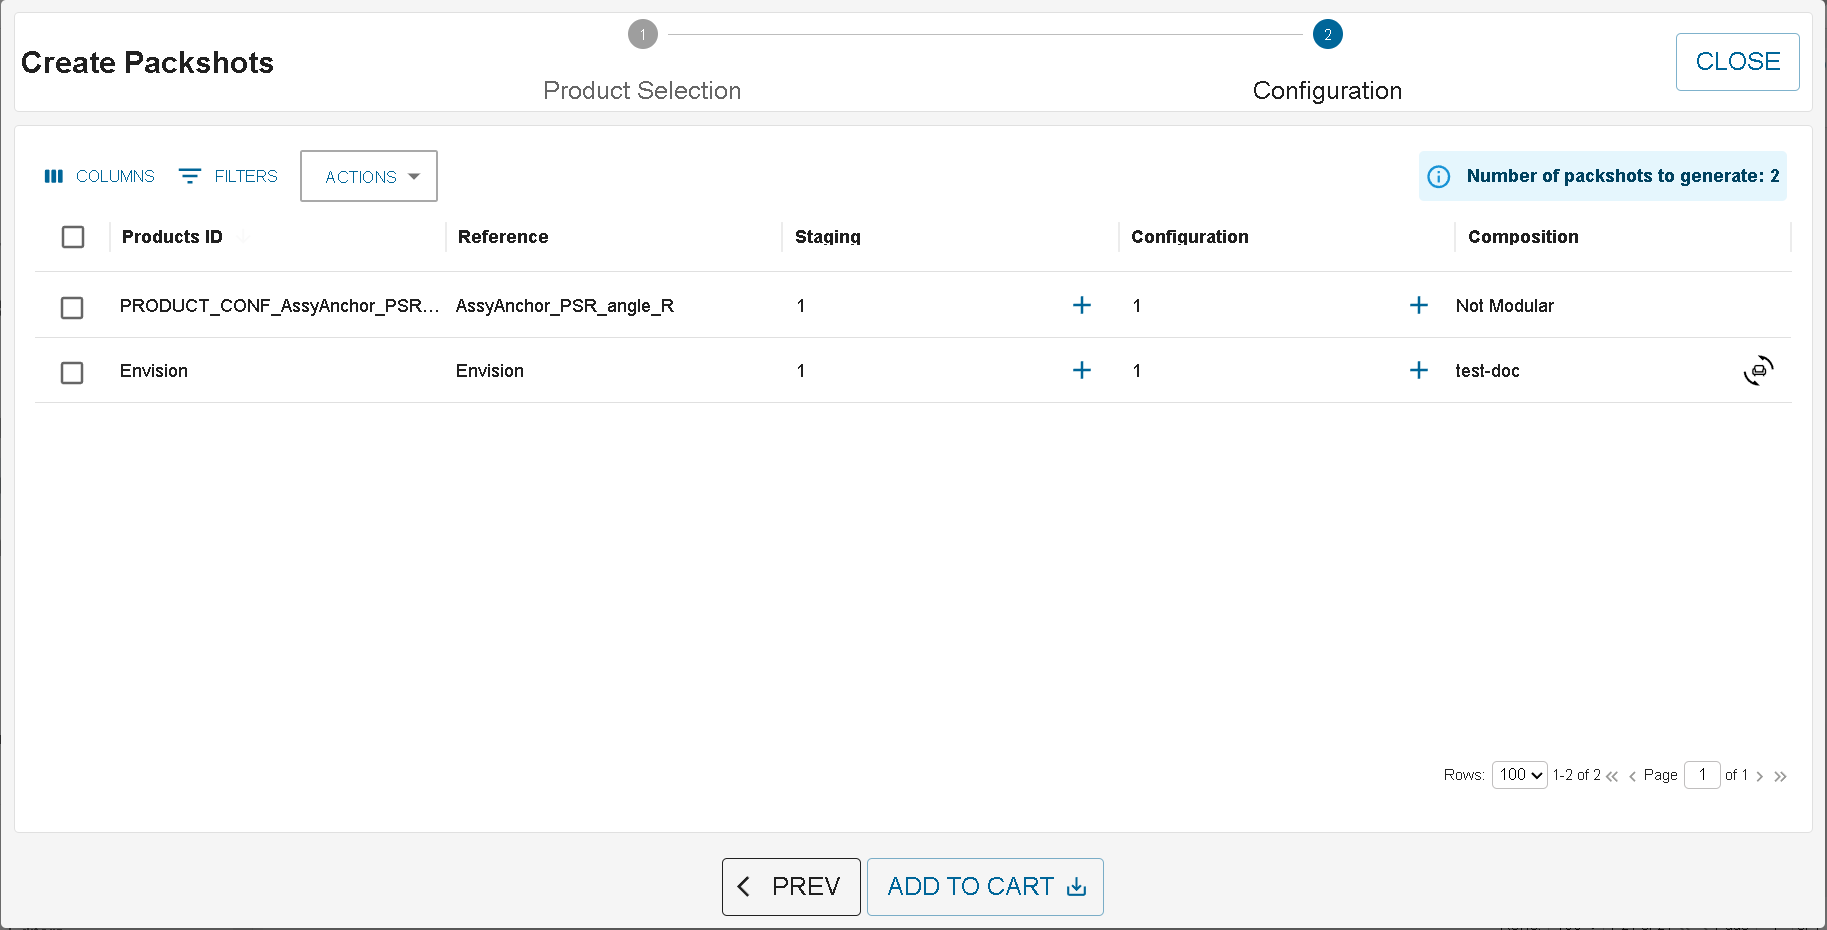
Composition choice
A Composition column appears next to Configuration.
Non-modular product: the cell simply shows the text Not Modular.
Modular product: the cell initially displays To do together with a small Product Configurator icon.
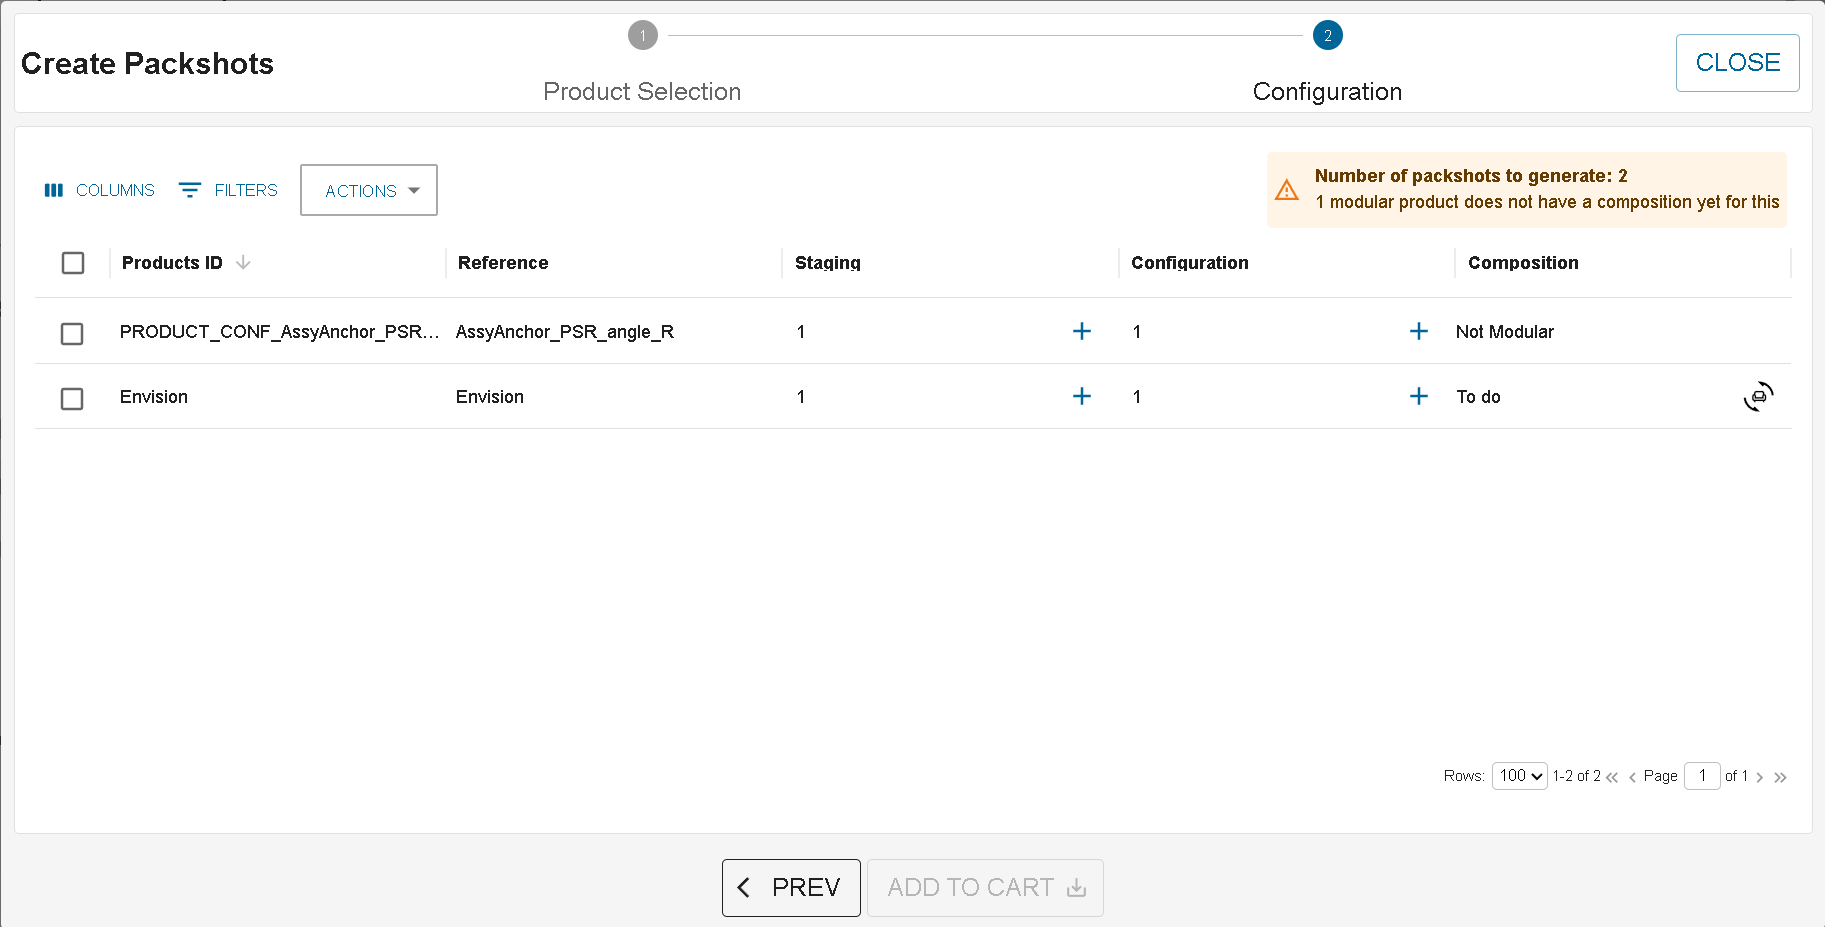
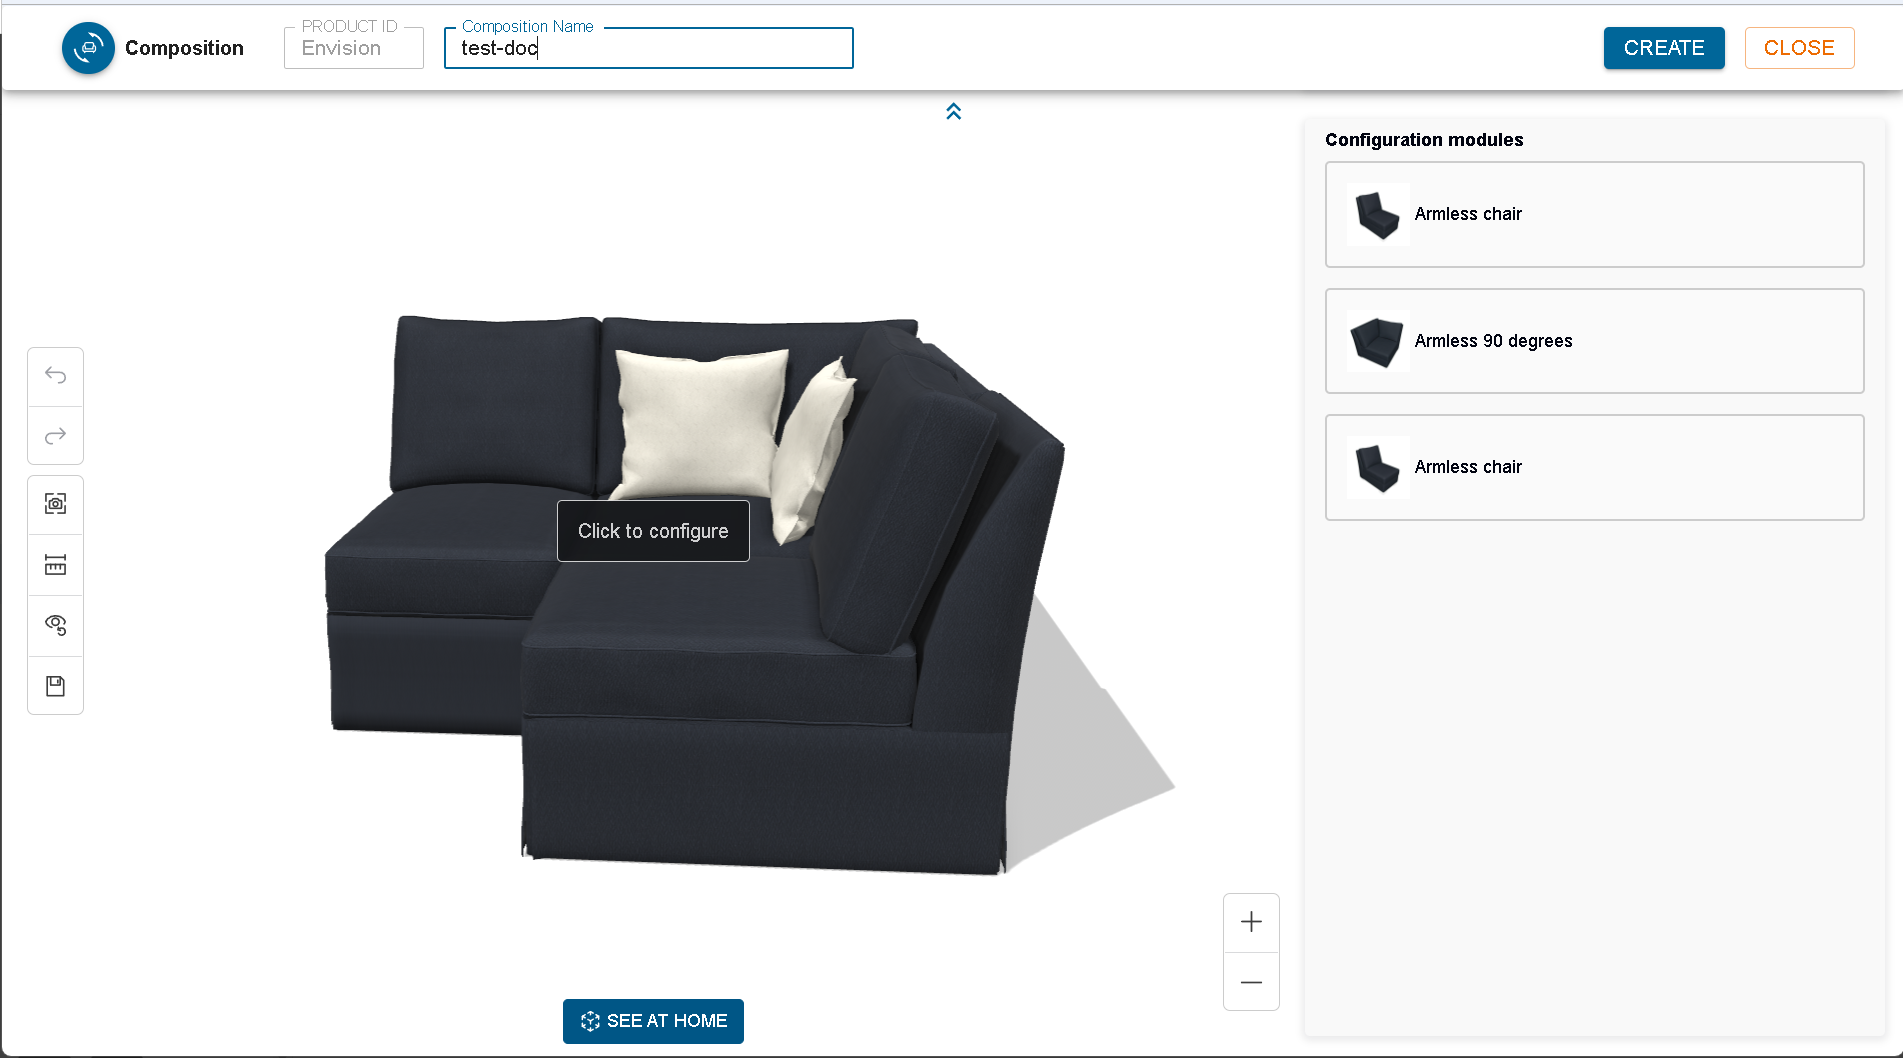
Clicking that Product Configurator icon (or the “To do” label) opens the Product Configurator in Composition mode.
Inside the configurator you give the assembly a Composition Name (default “New configuration”), arrange the parts, and press Create.
The Composition cell now shows the entered name, still with the Product Configurator icon.
Click the Product Configurator icon again to Update an existing composition.
When all modular products have a defined composition, the warning badge disappears.
If any modular product still shows To do, you cannot add the items to the cart until those compositions are created.
Once every modular product shows its composition name, you can add the packshots to the cart and submit the order.
In the Packshot cart, the same Composition column is displayed.
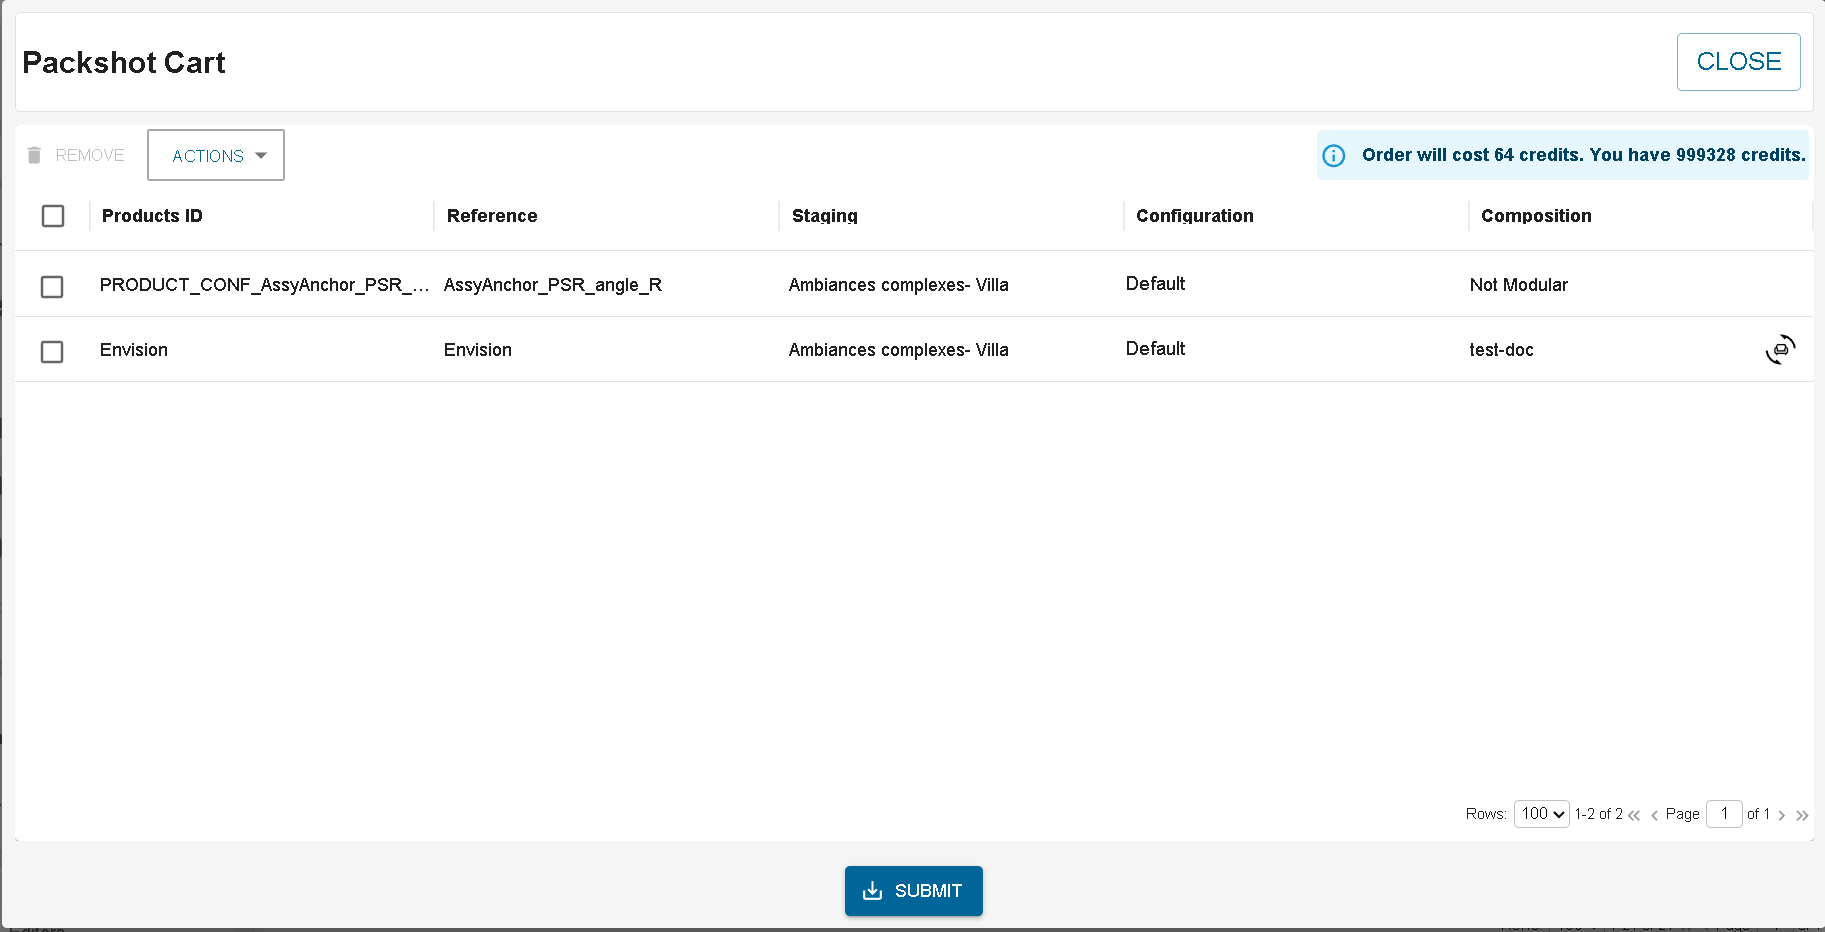
Click the Product Configurator icon to open it in read-only mode.
Packshot cart
You can now open the packshot cart:
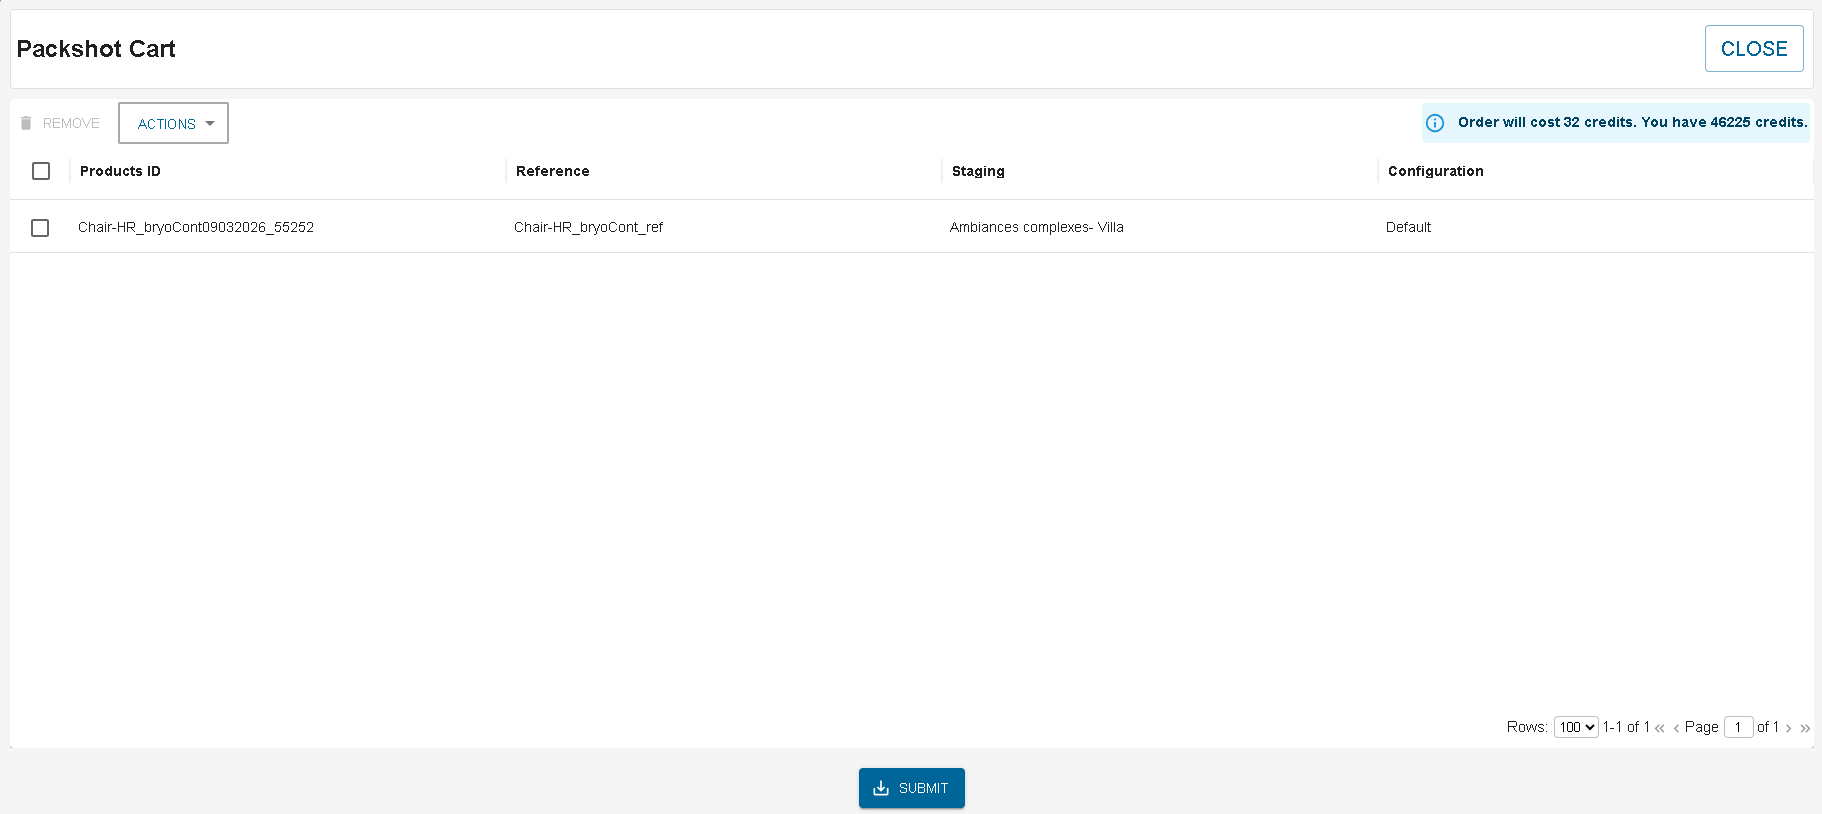
In here you have the full recap of all the packshot that are going to be generated on submit. You have also information of the cost and your remaining credit. If the cost is superior to the remaining credit, submit is not possible.
Submit will generate all packshot listed in this dashboard.
Order
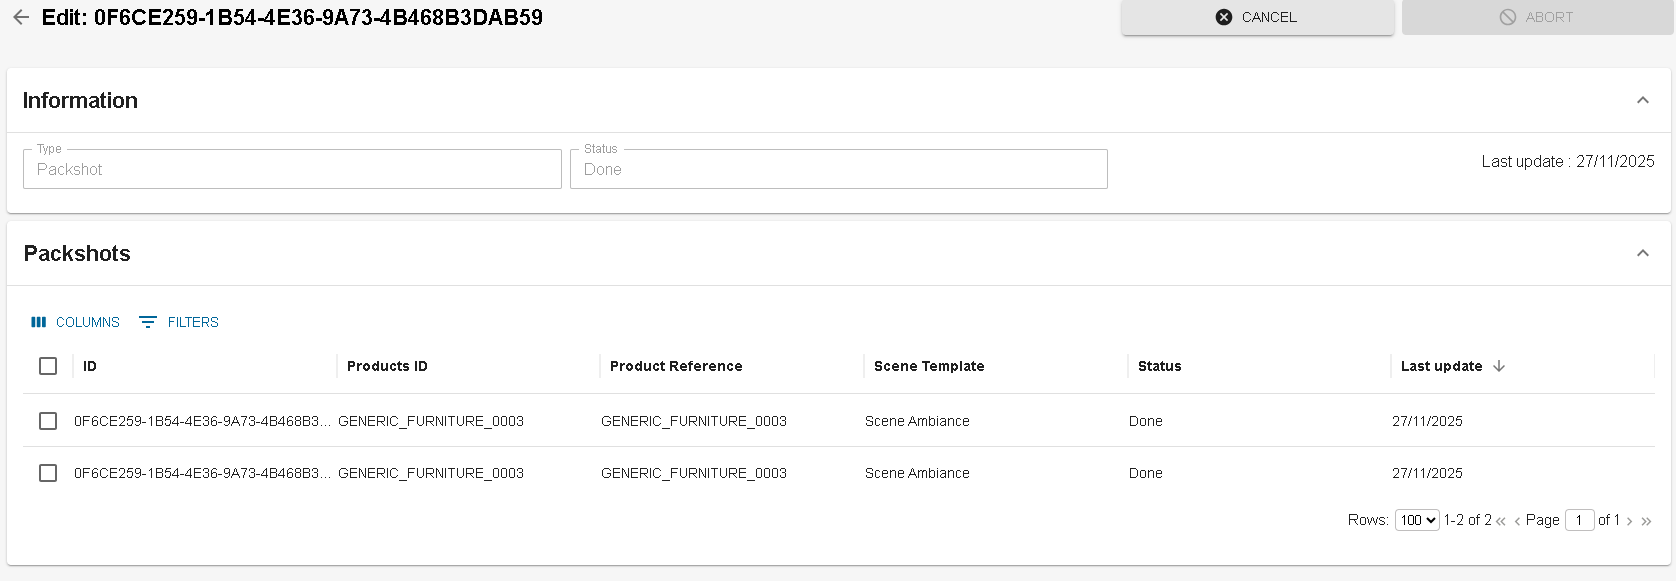
Once submit, the packshot creation can be followed inside the Order dashboard:
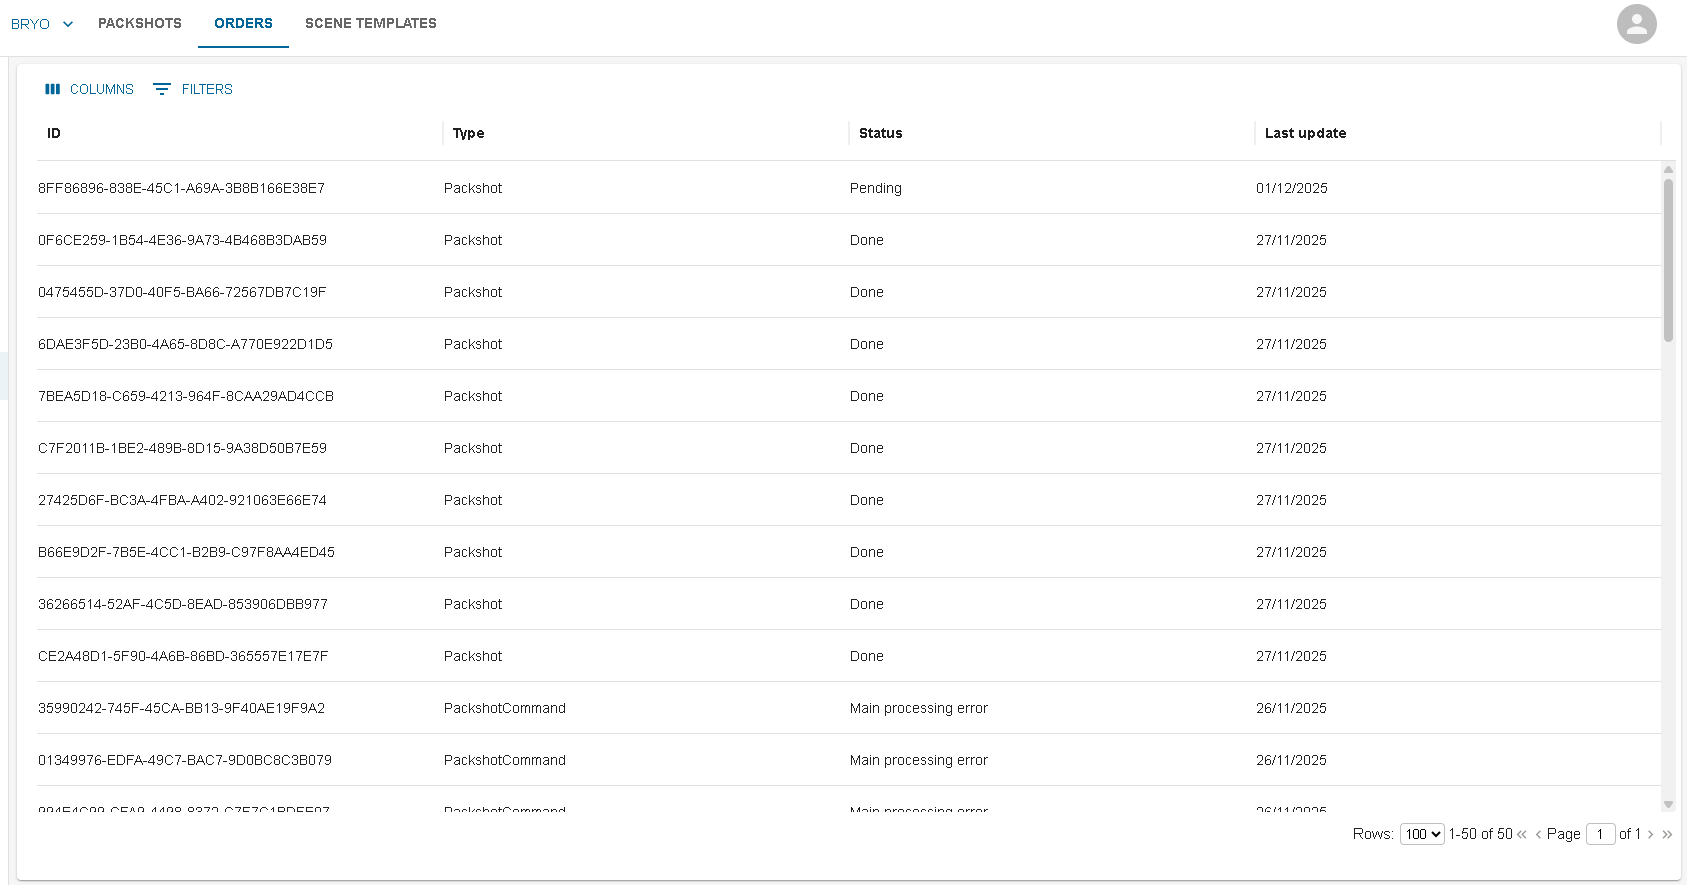
Clicking on an order, you will be able to see the status of the order and also for each packshot rendered :